So what is Brushwork after all and why it should be such a big deal while painting in watercolor?
Brushwork can be defined as the process of applying paint on canvas/paper using a brush.What contributes the final outcome of brushwork in a painting (in context of watercolor technique) are amount and consistency of paint in the brush, the shape and size of the brush, wetness and surface texture of the paper, angle of the brush to the paper while applying paint, motion or movement of the brush, pressure of the brush on the paper, speed of the brush on paper, how the brush is held etc. In watercolor painting brushwork may seem not to be that important. That is because most of the painting in watercolor can be done by wash and wet in wet techniques. And many times we just let watercolor do its own things on paper where brush is not involved. So we can do away with brushwork in a watercolor painting and still produce great looking works.But is it really so?
Even in wash and wet in wet watercolour techniques size and shape of the brush, angle and pressure of the brush, motion and speed of the brush play an important role. If you really think of it anything that you do with a brush on paper is actually brushwork. Brushwork is the major technique that contributes to the ‘style’ of a watercolor artist. Moreover unlike other surfaces watercolor paper is responsive to how the brush touches it. You go a little hard and the surface can get damaged. But at times a painting demands aggressive brushwork. Hence brushwork is as important (if not more) to watercolor painting as it is to any other medium.
Examples of Brushwork Watercolor Technique
Below are some examples of brush work in my paintings. These are only a few examples. The possibilities of brushwork are actually limitless and you have to experiment with different ways to really understand the range of brushwork that you can produce.
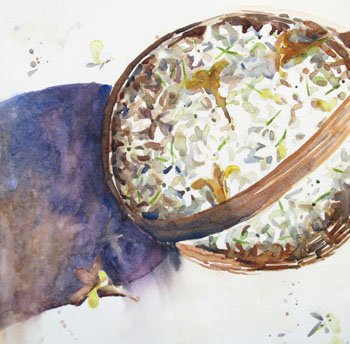
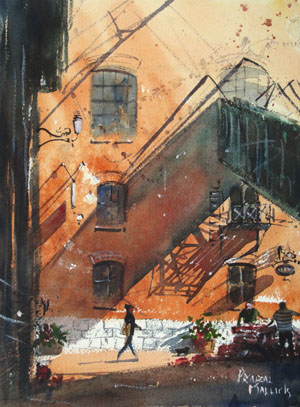
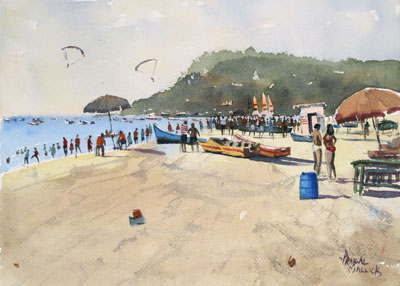
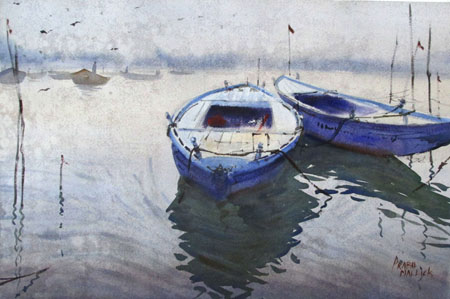
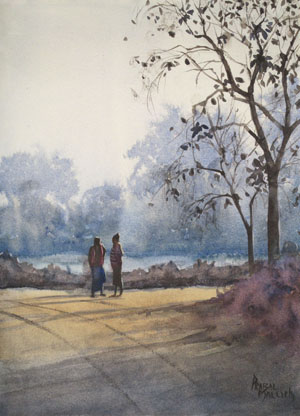
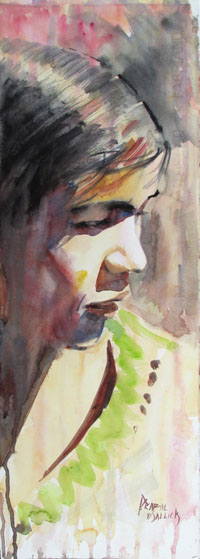
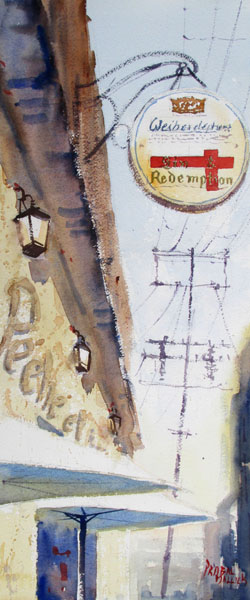
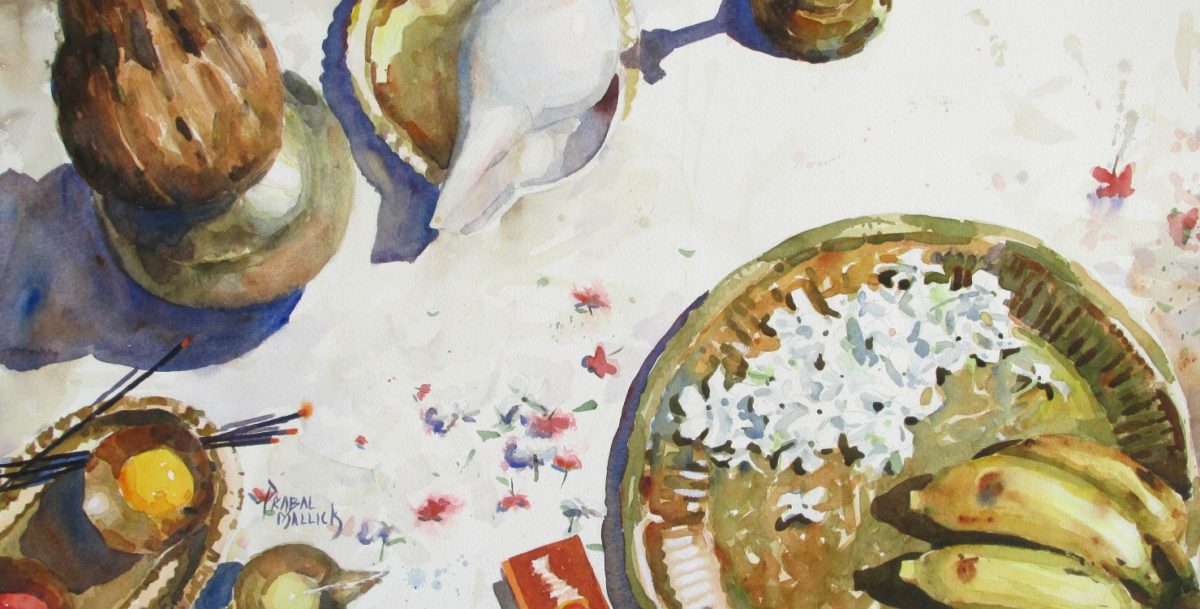
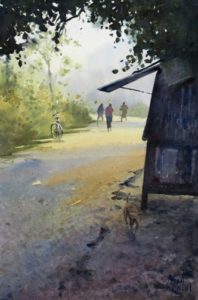
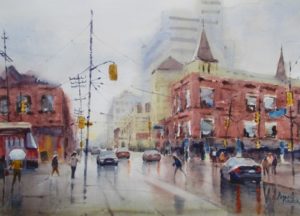
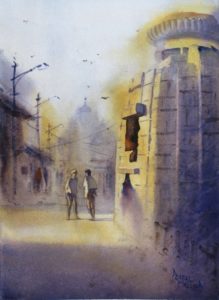
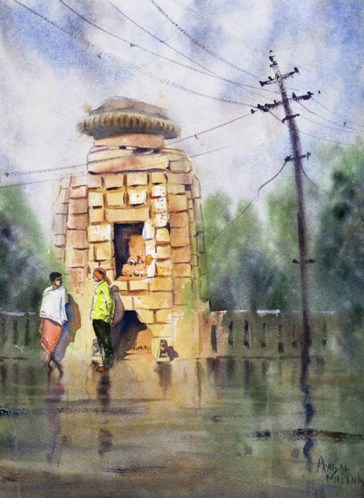
The white flowers in this painting are nothing but natural marks of a round brush in different tones, sizes and direction.The line shadows of different objects is actually what gives this painting movement and energy. These have been done with confident and fast strokes using a loaded rigger brush.The textures edge of the distant hills in this painting has been achieved by putting a semi loaded flat brush almost flat to the paper pointing away and then moving the brush forward and backward rhythmically.The reflection of the boats is done with a synthetic round brush using rhythmic overlapping horizontal strokes. Synthetic brush is used to get the fine pointed ends of the reflection shape.The almost dry leaves of the tree are done using the side of a round brush.The hair of the portrait is done with overlapping fast strokes of a flat brush.Fast and confident dry brush strokes using rigger and round brushes give life to this painting.The brown buildings in this painting are loaded with various types brush works. And this creates movement and interest.
Practicing Brushwork
Brushwork is all about practice. The idea is to get used to a brush and build muscle memory of using it in different ways. Hence a lot of deliberate practice is needed along with the practice you get from doing a painting. There are many type of brush control practice available on internet. You can pick up few of them and practice. The brush exercises by John Lovett is simple to understand and great for practicing.
The last thing I would like to touch upon is what is known as ‘Economy of brush strokes’. There is an optimum amount of brushwork that works for a painting. Anything beyond that makes the painting too heavy. It is always good to stay below the optimum amount of brushwork than to overdo it. Hence keeping amount of brush strokes to minimum in every stage of the painting is very crucial in retaining the freshness of the painting. And this fact can never be stressed enough.
This is the third post of Watercolor Technique series and in case you have to gone through the earlier two posts (watercolor wash technique and wet in wet watercolor technique) I highly recommend you do so as these techniques are prerequisite for learning glazing watercolour technique.
Glazing is a watercolor technique in which a layer of thin transparent paint is laid down over another layer of paint without disturbing it. Glazing is used for many purposes. You can use glazing to build up tones, adjust colors, mix colors on paper. You can also use glazing to get color depth and movement in your paintings.
Glazing Watercolor Technique
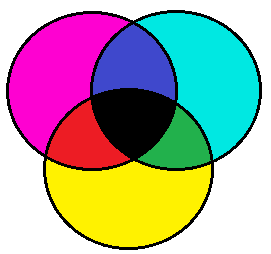
Color filter analogy for glazing watercolor technique
To understand glazing technique first you need to find out 2 to 3 different color glasses. It should not be transparent white. It should have some color. Red, yellow, Blue, Purple.. anything would do. Now take one glass and lay it over the other glass. What do you see? Light now passes through both the colored glasses creating a new color. What happens when you put two glasses of the same color on top of each other? The color seems darker. Glazing technique works exactly like these glass filters. In this watercolor technique you are creating micro thin filters of paint on top of one another. Lets now see how you do it.
Take two pieces of watercolor paper; either rough or cold pressed (know more about watercolor paper here). Give a flat wash of any transparent blue color (suggestion – french ultramarine) on one of them and any transparent red color (suggestion – crimson) on the other.
Let it dry completely. Its better to leave it for over an hour or so to dry. In humid conditions leave it overnight to dry. The idea is that the paint should dry well, so that when another layer of paint is applied on top of it, the original layer does not get disturbed. If the original layer is disturbed it will form mud. You can use a hair drier to dry the paint. But use the drier only after the paper has dried to touch, else you’ll be disturbing the pigments.
Now on the blue color wash apply a layer of red color wash. Do it as softly as possible. If you apply any force on the paper through your brush, the pigments from the blue wash will get disturbed. Hence do it as softly as possible. Also do it as quickly as possible.
On the paper with a red wash glaze over with blue paint. Let both the paper dry.
If you did you glazing correctly what you’ll end up with is two different shades of purple on both the papers. I hope by now you understand the analogy of color filters for glazing technique. Also you’ll see that on both the papers the shade of purple you get are different from each other. This difference is due to the difference in order of the color applied. When light bounces off the paper it goes through a blue filter and then a red filter in one case and in the other case it goes through a red filter first followed by blue filters. Hence in the first case you’ll see more of red in the purple while in the second case you’ll see more of blue.
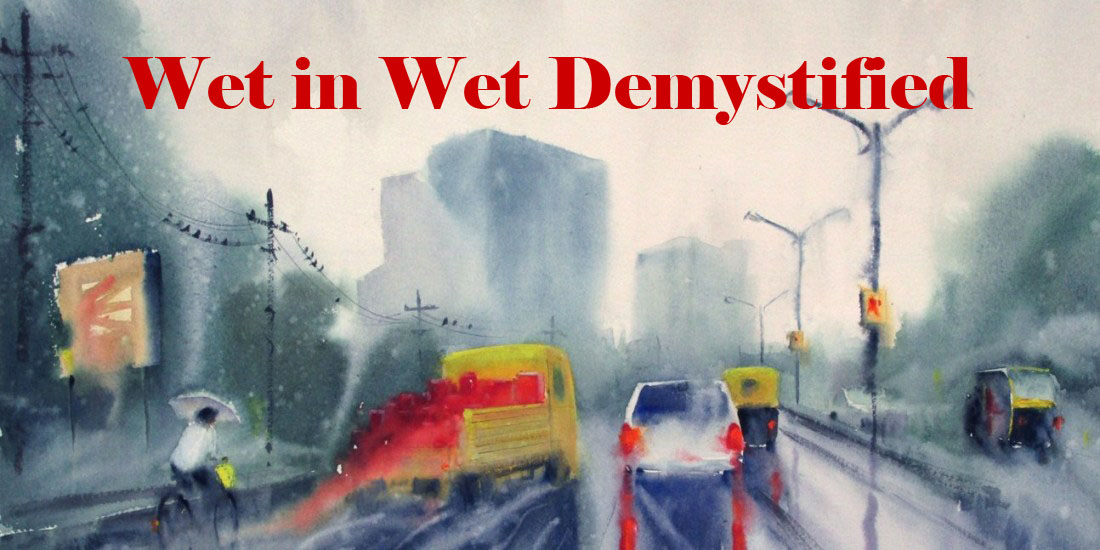
Wet in Wet Watercolor Glazing
Glazing can be used to generate movement
Glazing can also be done with wet in wet watercolor technique just like using wash technique described above. But you have to be extra careful about drying of the paint. The first layer of wet in wet wash should be completely crisp dry. Leave the paper for a day or two for the pigments to really stick to the paper. And this works well on rough paper only. Cold pressed paper may work to some extent. For the second layer wet in wet wash avoid using a brush to wet the paper. Its better to use a sprayer to wet the paper. This way you’ll minimize the chance of disturbing any pigment from the original layer of paint.
In wet in wet glazing it is very difficult to have anything more than 2-3 layers, while in glazing using wash technique you can have as many as 8-10 layers if done correctly.
Glazing technique is a time consuming process as you have to wait for each layer to dry completely. But the result achieved through glazing is something that can not be produced in any other medium. A tone built up using 3-4 layers of glazes has more color depth and movement than a color of the same intensity laid down flat. I’ll leave you with a few of my works as examples where I have used glazing watercolor technique to achieve color depth and movement.
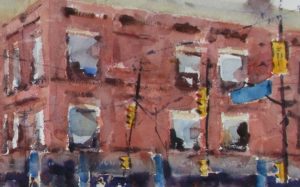
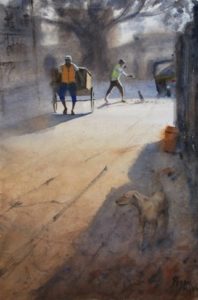
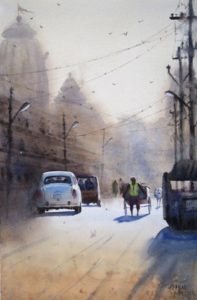
The foreground is a done with about 6-7 glazesGlazing has been used to paint the brown buildingsWet in wet glaze in the background creates a mysterious feelingThe background is wet in wet glazing over flat washWet glaze over the whole painting gives it the softness.
In my last post on Watercolor Technique I wrote about the Watercolor Wash technique. While wash technique gives luminosity or transparency to watercolor paintings, wet paper techniques like wet in wet create mystery and softness. If Wash technique is the heart of watercolor painting then Wet in wet technique could be called soul (or vice versa). In this technique watercolor paper plays a major role in the final outcome. Paper with more surface texture (rough and cold pressed) and more cotton content (100% cotton paper works best) is suitable for this technique. But you can try this technique on hot pressed and other smooth papers also and check the results you get.
Wet in Wet Watercolor Technique
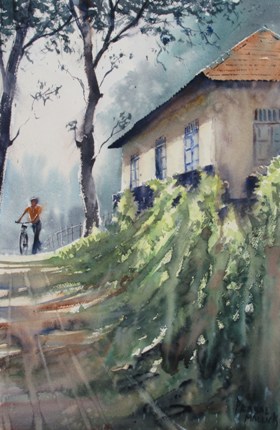
Background foliage done in wet in wet gives a soft and mysterious feeling to the painting.
If you zoom into watercolor paper you’ll see something like a relief map with hills and plains of the watercolor paper texture. When you wet the paper the plains get flooded. It looks like a big lake with hills popping out here and there. Now if you drop some paint onto the paper, what will happen is anybody’s guess. The paint will spread in the lake in all directions. And that is exactly what wet in wet technique is all about. It is a way of spreading colors on paper automatically using water.
Here is how you can try out wet in wet technique.
Wet your watercolor paper well using a spray or flat brush. If you are using a brush, make sure it is a soft one and touch the paper very lightly while wetting the paper.
Take some paint in your brush and lightly ‘drop’ it on the paper. Do not press your brush hard. It will damage the surface of the paper.
Now watch the paint spread on its own and enjoy the show.
Yes. Wet in wet technique is this easy. But the devil as always lies in the detail. Hence lets take a closer look at this. When you try this technique a few times you’ll notice that the spreading of paint is not consistent. Sometimes the paint spreads to a larger area and other times it does not spread as much. Well when the paper used is the same, the spreading of paint depends on two things.
How heavy or light is the flooding of your landmass! In watercolor terms how wet is your paper.
How thick or thin is the paint you are dropping.
How wet is your paper?
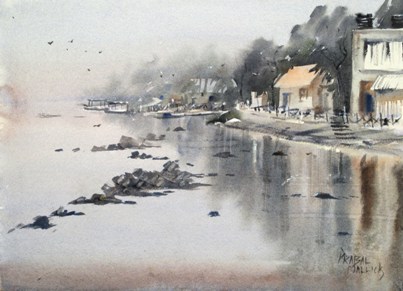
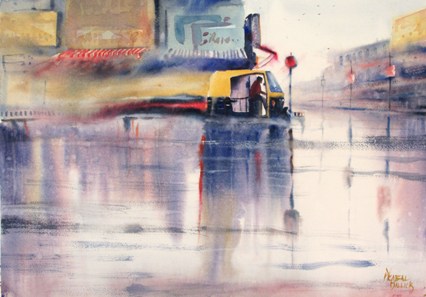
Reflections and the foliage is done using wet in wet with milk and cream on moist.
So lets first talk about different stages of wetness of the paper. The terms I am going to use are taken from this book by Joseph Zbukvic. These terms are very intuitive and are used by many watercolor artists around the world. Hence I have used them here. Why reinvent the wheel!
If you wet your paper thoroughly and then let it dry then the different stages of wetness is roughly categorized into 4 parts.
Wet – When landmass of the paper surface including most of the hills are flooded. At this stage your paper would be glistening. In this stage paint will flow very quickly and without any control in all directions.
Moist – In this stage the flood is not so severe. But still its a flood. Paper would be wet to touch, but not glistening so much. In this stage paint flows well, but its a controlled flow and does not spread to great distance.
Damp – This is like a normal situation where the rivers are flowing well, but without flooding. When you place your palm on the paper, you’ll feel the moisture content of the paper. It is a stage just before the paper dries out. In this stage paint does not flow much and it also does not flow on all parts of the paper. This stage is used to create a mixture of soft and hard edges.
Dry – In this stage the landmass of paper is barren dry. No sign of moisture whatsoever. This is your plain dry paper and hence paint will not spread at all.
How thick is your paint?
Foliage and Foreground was done using cream and butter on moist. It helps to pop out the center of interest in the painting.
This watercolor technique also depends on how much water you add to your pigments. Here are a few terms again from the book Mastering Mood and Atmosphere to explain the paint consistency in an intuitive manner.
Tea – Pigment to Water ratio is around 1:9. This will spread fast and without control.
Coffee – Pigment to Water ratio is around 3:7. This will also spread well with soft edges; but not so well on damp paper.
Milk – Pigment to Water ratio is around 1:1 This will spread well only on wet and moist paper.
Cream – Pigment to Water ratio is around 7:3 This spreads well only on wet and moist paper. But of course it will spread less than milk.
Butter – There is no water in this mix. Just pure paint straight out of the tube. This will tend to stick to the paper at the place it is applied and only a part of the pigments will loosen up and spread on wet paper and to some extent on moist paper.
Here is a demonstration video using different combinations paper wetness and paint consistency in watercolor wet in wet technique.
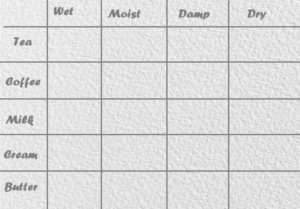
Wet in Wet Watercolor Technique Reference Table
Wet in wet reference table
Now that you know about the different stages of wetness of paper and paint consistencies, its time for you do an exercise. By doing this exercise you’ll understand the behavior of paint for this watercolor technique and different types of edges that are produced. And then when you have the understanding of the edges, you can apply it to your work consciously.
Create a table as shown on watercolor paper. The individual boxes should be 2 x 2 inch at least.
Now wet the first row of the matrix using a flat brush.
Take a tea mix and drop in the first box.
Wait for sometimes for the paper to come to moist stage and then drop tea mix in the second box.
Wait again for sometime for the 3rd box to come to damp stage and drop tea mix into it.
In the last box drop the paint when paper is dry.
When the first row has dried out wet the second row and repeat step 3 to 6 using a coffee mix.
For 3rd, 4th and 5th row use milk, cream and butter to complete the exercise.
Now what you have is a wet in wet reference table. Use this table next time to get the edge that you want in your painting.
Lot of unusual effects can be obtained with wet in wet technique.
By now it must be clear to you that wet in wet watercolor technique is all about timing. You have to get a feel of how wet the paper is and how much water you have put into your paint. This ‘feel’ comes with practice. The reference table that you must make will not come out well in your first few attempts. As you practice more and get the ‘feel’ your reference table will keep improving and will be perfect at some point in time. And that is a milestone you must aim for to achieve. And when you have got a good hang of wet in wet watercolor technique, the range effects that you can get with this is limitless.
A few days back a young and enthusiastic painter asked me about the watercolor technique I have used for a particular piece he seemed to like. Unfortunately I disappointed him by not answering the question because I myself did not have a clear answer to the question. When I paint I am really not thinking in terms of watercolor techniques. I am thinking in terms of the result that I want to achieve (sometimes my thinking is too abstract to be understood even by me). For example I think “I need a soft edge here”. I do not think “I need to do wet in wet here”. Though wet in wet is one of the watercolor techniques I would employ to get the soft edge I do not necessarily think in terms of the name of the technique. I just use it.
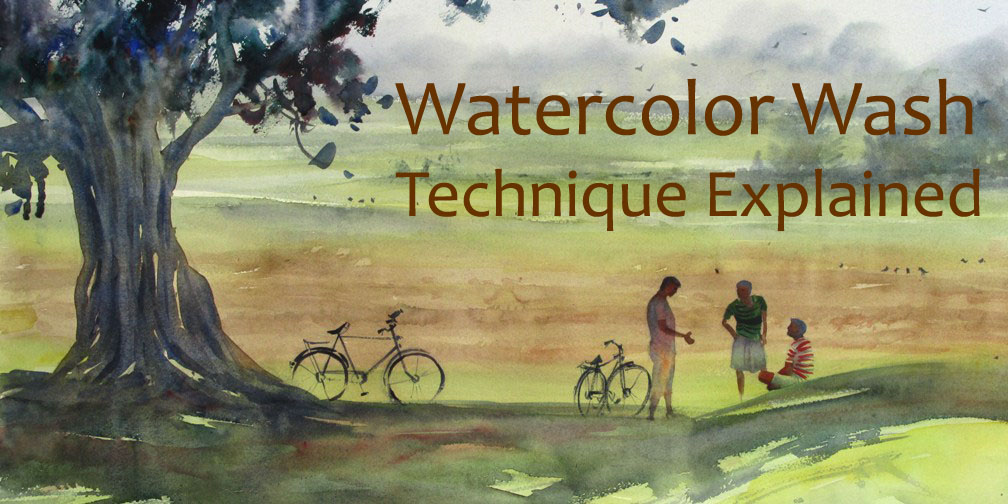
But at the same time talking in terms of techniques help in specific non-abstract verbal and written communication. Especially for beginners who are focused on learning handling of paint and brushes, it is very necessary to speak in terms of techniques. In this series of posts I’ll touch upon Watercolor Techniques I have learnt and used in my works so far. These techniques are going to be from basic to the specialized ones and I am sure it will help everyone learning watercolors. In the first post of this series I’ll discuss the Watercolor Wash Technique.
Wash, The fundamental Watercolor Technique
In watercolor it is best when you let gravity do most of the painting for you. When you let the paint flow down the paper using gravitation force of the earth, the color pigments settle in the troughs of the paper surface in a natural way and that creates a luminous look. This is known as ‘washing’ the paper. Quite an intuitive name for a painting technique I would say!
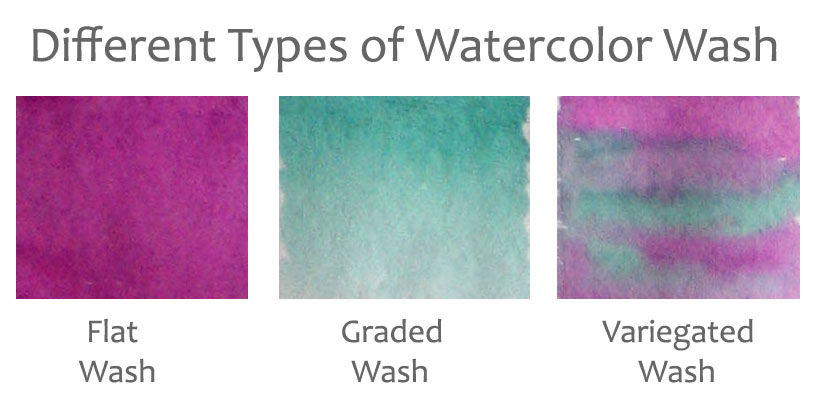
Watercolor Technique – Different types of watercolor washes
This is how you go about the wash technique.
Keep your board at an angle to the the ground, so that water can flow downwards slowly.
Mix pigments with water and load a plump brush that can hold a large amount of water. Mix enough paint so that you don’t run out of it in between.
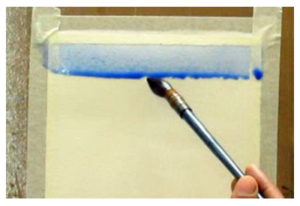
Now touching the paper softly with the loaded brush make stroke at the top part of the paper from one end to the other.
Observe how the paint flows down the paper and forms a ‘bead’ at the bottom of the stroke. Now put a second stroke just below the first stroke touching topmost part of the brush to the bead, so that both the strokes combine become one.
Do not touch the first stroke. Just use the bead to put the second stroke so that both the strokes combine.
Again let the bead form at the bottom of the new stroke. If the bead is not forming you are not using enough paint. Supplement the stroke with some more paint so that the bead can form . Now using the bead put the next stroke so that it combines with the stroke above.
Continue till the end of paper avoiding going over painted areas again.
Voila! your first proper watercolor flat wash is now done.
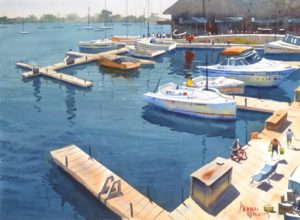
The lake is done with a flat wash of blue. Later strokes were added for the ripples.
Here are answers to some FAQ on this watercolor technique.
What is the angle of the board to the ground? – The angle of the paper to the ground can be as low as 10° as high as 90°. Higher the angle faster the water will flow down the paper and hence you have to work faster to control the flow. For beginners I would suggest keeping the board at approximately 20°-30° to the ground. As you get more and more comfortable with handling watercolor you can vary the angle according to your convenience.
What is the paint to water ratio for wash technique? – The paint and water mixture should not be thick. It should be of a watery consistency like tea or milk and everything in between. Else the paint will not flow down the paper. For starters make a mix of 20% paint with 80% water. Increase and decrease the amount of water and then observe how the wash comes out.
How long should I wait for the bead to form? – Don’t wait for ever to let the bead form. If you wait too long then a hard line will form at the bottom of your stroke, because the paint will start to dry. If your paper is not of artist quality then the hard line forms much faster.
What brush should I use? – You can use a round brush or a flat brush for the wash. Make sure it can hold a lot of water. A mop brush works really well for wash as it holds the maximum amount of water.
What is the size of the brush I should use? – Size of the brush really depends on the size of the area you are going to wash. A brush should hold enough water to make at least a couple of undisturbed stroke from one side of the paper to the other.
Graded Wash
Bead of paint forming at the bottom of a stroke
The outcome of a graded wash is similar to flat wash except that the color intensity slowly increases of decreases from top to bottom of the paper; The kind of wash that you’ll see in the painting of a sky or vast green fields. To make a graded wash follow the same method as a flat wash. But instead of using the same mixture of paint every time, use a more diluted paint mixture for every new stroke. Keep adding water to the paint mixture as you go down the paper putting strokes.
Some Tips on Graded Wash Watercolor Technique
When you are creating the wash the paint is still wet and the gradation of the color will be difficult to see from one stroke to the other. Many beginners tend to put more water to the subsequent strokes than what is necessary because of this. And this creates a hard transition of tone. So do not worry too much while creating the wash. Just keep adding consistent amount of water from one stroke to the next and you’ll have your beautiful graded wash in the end.
Preferably do not use the brush with which you are painting to get more water into the mix. Use another brush or a water dropper to get more water into the mix.
Generally it is easier to go dark to light in this watercolor technique. In other words it is easier to make the paint consistency thinner as we go on creating the wash. You can also do the opposite. That is keep adding more pigments to the mix as you go on putting strokes. But the watery paint from the top stroke tends to push out pigments of the new stroke, which is thicker. So this needs some mastery to be done well and also needs to be done at a lower slope of the board. One hack to go light to dark is to paint dark to light by rotating the paper by 180°.
Variegated Wash
This type of wash is used to gently merge colors into each other to create a slow color transition effect. You’ll need minimum 2 colors for this watercolor technique.
Lay down a wash of one color quickly on paper. The whole paper need not be filled with it.
Before it dries introduce wash of second color into it gently. The second color should not be applied evenly. You can leave some areas of the first color as it is and you can paint over unpainted areas with the second color. In rest of the places the two colors will merge into each other creating a third color.
Continue the wash down the paper by using both the colors.
All the time while you paint make sure that you are letting the paint flow on the paper due to gravity. Let it dry and see how magically the colors have blended into each other.
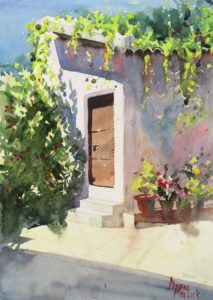
The shadow on the wall has been done with a variegated wash of pink and blue.
A wash technique in the end remains a watercolor technique whereby you use gravity to pull the paint down and let the pigments settle on the paper naturally. And this is what gives watercolor painting its luminosity. If the paint is not allowed to flow naturally, it becomes muddy and looks really bad. So irrespective of the size and shape of the area that you paint in watercolor, if you want a transparent look you have to use wash technique. Be conscious of this fact while painting and get into the habit of using this watercolor technique. Soon you’ll notice the difference in your work.