There are times when you could be at the top of your game. Painting well, painting in a good rhythm, creating masterpieces on a regular basis. But still the satisfaction of creating them is a short lived one. This little voice in your head starts whispering in your ear and keeps telling you that you have become too comfortable. And when that happens it is a tricky area to be in for an artist. You know you are in a good place and common sense tells you to enjoy it as long as it lasts. But then the creator inside you never likes to be ‘comfortable’ and wants to create something new. And funnily enough this situation is the trigger to reinventing oneself; Yet another creative process of making art.
I too am trying to reinvent myself and in this post I’ll share my method which I have followed till now.
The Comfort Zone Trap
Spontaneous creation of from a ‘blank’ state of mind
The comfort zone builds up slowly. But it surely happens multiple times in a creative journey. Its a nice place to be in, but not for long. Because the more you get attached to it the more difficult it becomes for the artist in you to develop. So its good to be aware of this fact and just keep doing a sanity check once in a while if you are getting into the trap. A close look at your recent works will help you. Check if a certain pattern is glaring at you from those works. Check if you are getting repetitive. Do an honest assessment and your works will tell you if you are slipping into a comfort zone.
Well I did not do any such checks. I just strongly felt I need to do something new. And that I guess came from subconsciously seeing a pattern in my works.
Starting From Blank
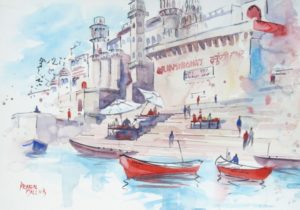
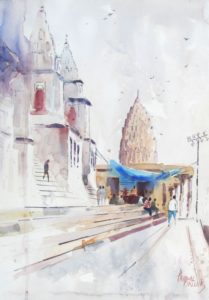
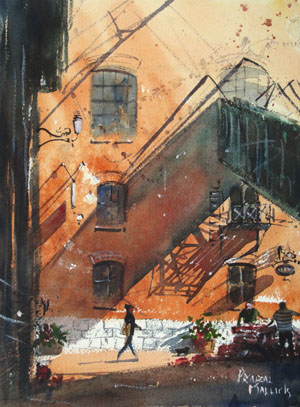
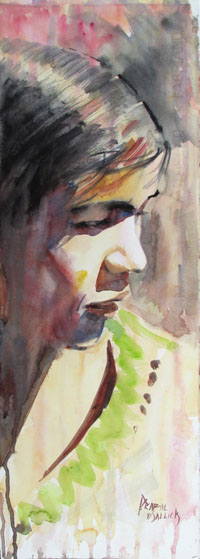
Refining the spontaneous sketch during conscious exploration phase
You have identified that you are in a comfort zone and you want to break out from it. But now what. How do you let go of your style to do something new that you are not even aware of. This is a good problem to solve in the creative process of making art. I am going to tell you the process I followed and its just one way of doing things. You can invent your own method. You can even try my method. It is fun by the way.
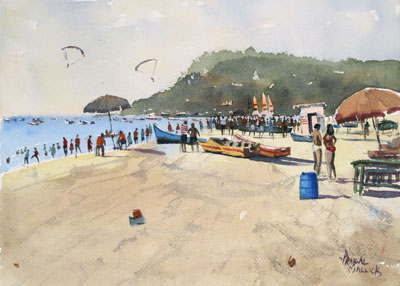
Conscious Exploration of ‘new style’
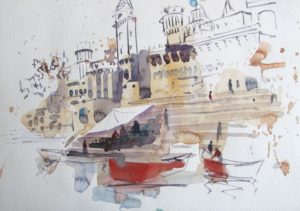
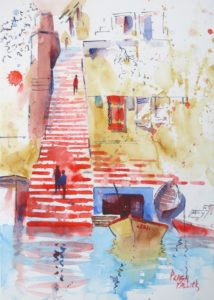
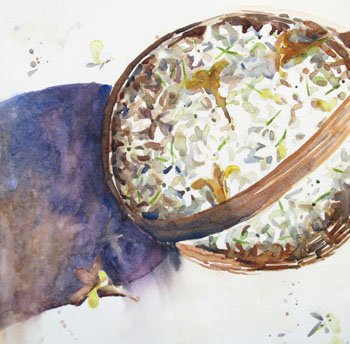
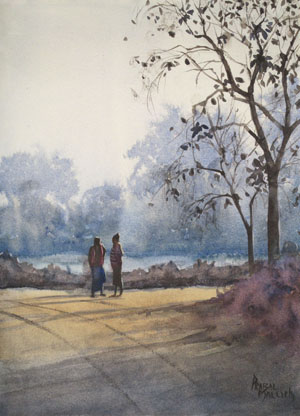
I started from blank. I also made sure that I don’t use my regular paper, brushes and palette. First I arranged my paper, paint and brushes around me so that I can start painting as soon as I want to. Then I randomly picked a reference photo without looking at it and then closed my eyes. Next I visualized darkness and meditate on that to allow my mind to become empty. At some point I opened my eyes, looked at the reference pic for a few seconds and then started painting. I just let my hand move as fast as possible in a subconscious and spontaneous manner. I took around 10-15 minutes to paint and then went away from my easel. When I came back to it after sometime I tried to find a new visual language in it which I can pick up and explore further.
Explore and Allow Yourself to Fail
Conscious Exploration of ‘new style’
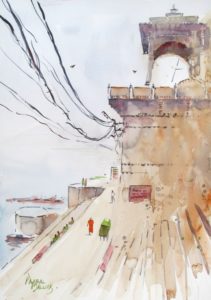
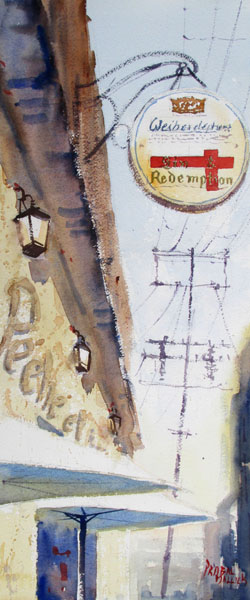
And I did find something I could pick up on. In this case because of the nature of the paper I had to limit my washes to light ones and number of layers to only two. And as I had ‘thrown’ paint at the paper, some parts of the painting was not painted. I had taken a spontaneous decision and had ‘drawn’ the unpainted parts with a rigger brush using black paint. So I decided to try these things out. That is
‘Throwing Paint and leaving a lot of white of the paper
Limiting maximum layers to only two
‘Drawing’ with rigger to suggest the unpainted parts.
Conscious Exploration of ‘new style’
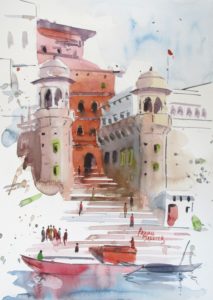
Now again this step is about exploration just like the last step. But this is more conscious while the previous step was more subconscious effort. In this step as you can see from the pictures I was trying different ways of ‘throwing’ paint and leaving out whites and also different ways of drawing the unpainted details. Some seem to work while other did not. The idea here is to paint with abandon and try things without fear. The more you fail the more you learn. Allow yourself to fail in this step of Creative Process of making Art.
Finding the ‘New’
The whole idea behind the previous step of conscious exploration is to get used to the new thing you have found and establish it in your mind. The paintings that did not work teach you what to avoid and the ones that worked teach you what looks good. This way your decision making becomes better in your new found style. And as you keep painting more and more holding on to the spirit of the new method this decision making gets more refined and your muscle memory also get stronger. And then there comes a time when you become really good at it and the next comfort zone sets in. And then its time to break the barriers all over again.
Conscious Exploration of ‘new style’
As far as my exploration goes there was a divine intervention. One of my idols happened to nudge me a little to align me to the right direction through a comment on one of the works I posted on Facebook. Now I’ll try to look for subjects to suit this new style and keep refining it. As I keep at it hopefully I’ll find a new visual language somewhere on the way. And again hopefully that would lead to a set of accomplished and satisfying works till I get dissatisfied again.
So in no time you find yourself staring at the week leading to your exhibition. You have planned and prepared well. Your promotion of the show is also going on fine. But don’t just relax yet. And if things have not gone as per plan, then do not just lose heart. Put whatever you have got into this week and you should mostly be fine. This week is about follow ups. Its about making sure that everyone who has a role to play in your art exhibition is gently reminded of his role. Visit the gallery and talk to them about when you’ll be ready with the art works and chalk out a display plan. Check who will be there to help you with everything including display, administration, lighting, seating arrangement etc. Talk to them and chalk out a plan and keep all stakeholders well informed about the plan. Check with your esteemed guests for the opening day again and check if any conveyance arrangement has to be done for any of them. Communicate the time of the opening of the show again. Send a gentle reminder to members of the press.
Food and Drink
Check with a good local caterer and book them for your show for refreshments. For this you need to make a rough estimate of the number of guests that you are expecting. Don’t make a conservative estimate. Make a positive estimate. Expect everyone to come. Because it is okay to have extra food at the end of the show rather than not having enough food for everyone. Again put the caterer in touch with the gallery and let them work out other logistics between them.
Who will host the show?
If you have hired a curator then she will in all probabilities anchor the opening day function. And in most cases the galleries themselves conduct the opening day function. So just check with the gallery. In case they are unable to conduct, then you’ll have to find a person who can be the master of the ceremony for your opening day function. And it helps a lot to have a professional on this. You also need to get a brief introduction on all your chief guests and hand it over to the person conducting the opening ceremony.
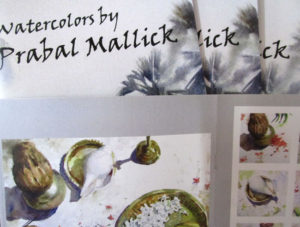
Time to print the catalog
Design and print a great catalog for your art exhibition
This week is also the week when you get the catalog printed. All the participants of the show have to finalize their works by this time and you have to have designed the catalog by this time. If any last minute changes need to be done to the catalog it needs to be done now and it should go for printing at the beginning of the week. You really can not leave it to the last day.
This week is the week when you’ll have to make final adjustments to everything. May be one of your guests backs out, may be the framer has still not procured the frame of your choice, may be you have run out of invitation cards or it could be some other crisis situation. Just don’t lose your cool. Keep calm and handle the situation.
The Day Before the Show Opens
Make a Checklist
No matter how many exhibitions you have done, the opening day is bound to make you a little nervous. And these jitters can spoil the party very easily. One of the ways you can handle the situation by creating a checklist and ticking each item off as it gets done. Your checklist will have things like following up with your caterer, curator, esteemed guests, having price list, catalog, guest register in place, not forgetting to carry your written speech and the pen drive having music that you have selected for the show. Take time and do a thorough checklist to have things in control for the opening ceremony.
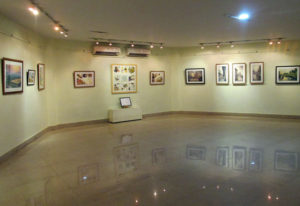
Display of the Works
Hang the paintings at least a day before the show
Paintings need to be put up a at least day before the show begins. In case a show is already running before your exhibition begins, the paintings will get put up in the night before the opening day. Do not leave this task to the opening day. Even if it gets late in the night get it done a day earlier. You need to be present when the display is in progress so that you get it done as planned and as you want to see it. It also helps to have a couple of your friends with you to get a second opinion for the display. You will invariably need to do some adjustments according to the lighting, viewing points and actual display options available (against what what was communicated to you earlier). So be present when display is in progress.
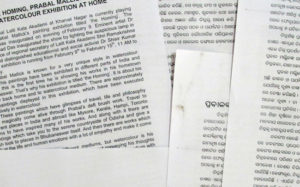
Make a Press Release
Press release for my last art exhibition
You need to do an official press release for the show. It can be done a day before the show. But I like to do it on the opening day itself after the opening ceremony. Such press release includes information about the opening and the people present for opening. This creates more interest. Moreover if you do the press release a day before the show you may end up having huge turnout for the opening, which you may not be able to handle.
Sleep Well
You’ll need a lot of energy for the opening day. So its very important to get good amount of rest. In case you are busy in display of the art works and it gets late, sleep a little late into the morning. Wake up with a fresh body and mind on the day your art exhibition opens. Take a good shower, eat a hearty breakfast and get ready for the day you have been waiting for.
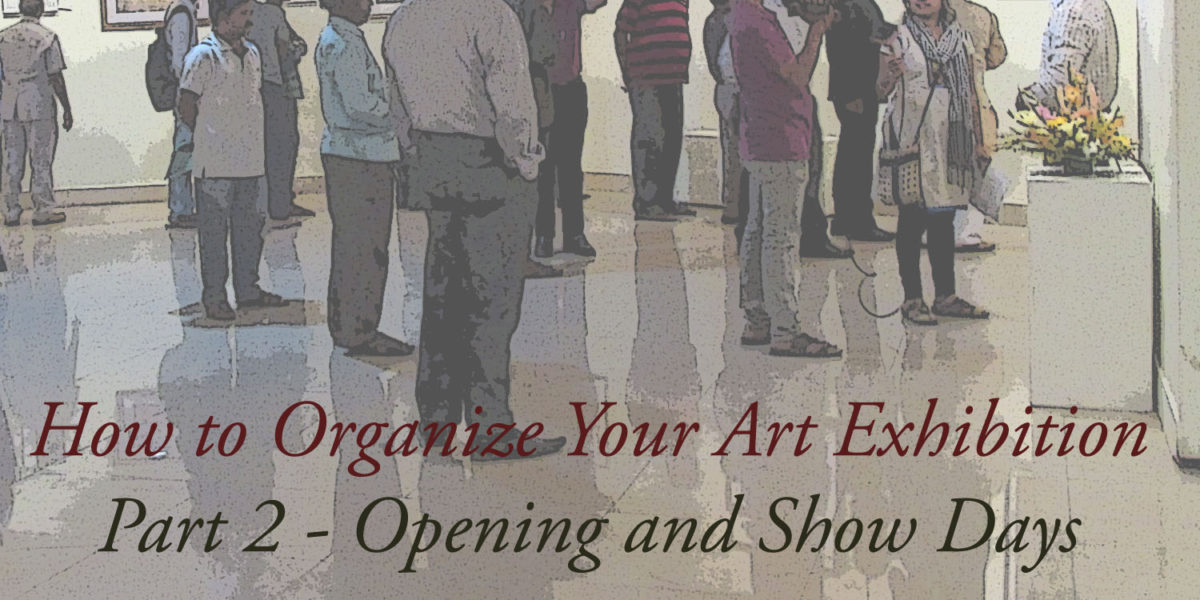
Opening Day of the Art Exhibition
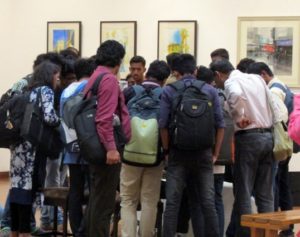
Crowd on the opening day of my last watercolor show
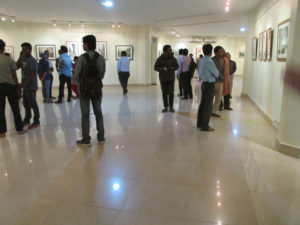
Its opening day and you are bound to have butterflies in your stomach. So go back to your checklist and complete all the little tasks you have noted there. Get ready and look your best. Be present at the gallery well in advance; at least two hours ahead of the opening time. Go around and see the arrangements. See how your works look on the gallery walls. Soak in the atmosphere and get used to your surroundings. This will help you calm down your nerves.
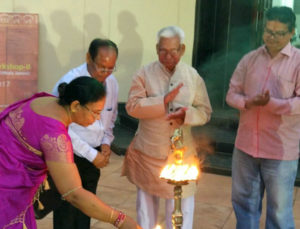
Lamp lighting ceremony from my last art exhibition
When the opening ceremony is over and the gallery is open for viewing there will be a lot of people wanting to talk to you to understand your art, just to say how good it is or may be even for buying a piece. Your job then naturally is to talk to such people. I have seen artists who would just continue talking to their friends, relatives and family. Of course you should talk to them also, but not at the cost of talking with a potential customer. Your art exhibition is not for your family and friends. They probably would have seen most of your works anyway. Your show is for rest of the world. So make yourself available for rest of the world during opening of your art exhibition. The best thing that you should be doing during the opening is to talk to as many people as possible, covert most of the interests into sales, build rapport with your viewers and network with other artists and buyers.
The Other Days
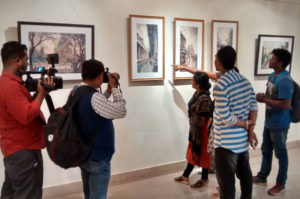
Press covering my solo show
The opening day is generally very exciting. The gallery becomes crowded, buzzing with art lovers, artists, media, buyers and your friends and family. Everyone wants to talk to you. A few works also get sold. You have to oblige a lot of people by posing with them for a picture. Basically its a blast. Unfortunately the rest of the days are not like that. So your promotion has to continue during this time to pull people to your art exhibition. Keep distributing fliers, promote on social media, use radio and newspaper to keep reminding people that an awesome art exhibition is running in town. Planned activities like painting demonstrations and art talks also help in getting more crowd. Ask your friends to share pictures of the exhibition on all kinds of social media. Invite the students of nearby school to come and see your exhibition. Again there is no end to what you can do to get people into your art exhibition.
One important note. Keep checking your guest register everyday. Some people may have left a note for you for further business. Contact such persons immediately.
Wrapping Up
When people buy your art check with them if they can let it hang in the gallery and collect it on the last day of the show. Most people would agree to it. A day before your show ends, just give a call to your buyers and remind them that they have to collect their paintings. On the last day when your buyers come to collect their paintings meet them and hand over the paintings to them personally.
In case some of the guests have not been able to come down to your exhibition its a good idea to drop them a message or call them. Announce on social media that its going to be the last day of your exhibition. Try your best to draw as many people as possible even on the last day.
When you finish your paperwork and financial transactions with the gallery don’t forget to collect the gate pass. Gate pass is basically a permit issued by the gallery to let you leave the premises with your works.
After your art exhibition is over get a good day’s rest. And then its time for some follow up. Go through your guest register check the comments. once again. Check if you have missed out any action item arising from there. Also collect all the contact information and store them at one place. Your contact list will be very helpful whenever you do any activity like a class, workshop or even another show. Start following up with any leads that you have got during the show.
Art exhibition is a process not only of showing your art to the world; It is a process of engaging with the world through your art. I hope this two posts would help you with organizing your first art exhibition. If not first then hopefully it will help you organize your show in a better way, so that you get maximum engagement with the rest of the world through your art.
I don’t exactly remember since when, but all I can say is that since I was a small kid I always wanted to hold an exhibition of my paintings. Though I was always painting, but having an exhibition seemed like a mystery that I would never be able to solve. But it all changed in 2009, when I decided to solve that mystery and had my first group show in Jun-July 2010. And since then I have had numerous group shows and three solo exhibitions in different parts of India. In this post I’ll talk about How to Organize an Art Exhibition mostly in an Indian context.
The first question that you must ask yourself is whether your work is mature enough to be shown to the public. To find out whether you are ready you can take your work to a few well known artists in your proximity and ask for their feedback. You can also participate in local art fairs to see how your art fares with respect to all the other artist’s works in the fair. Though these are not quiet objective methods, but they do give you pointers about whether you should be doing a exhibition now or not. Second point to be considered is whether you have enough in your repertoire to be exhibited. So when you decide that you are ready to show your art to the world and you have enough to be shown its time to start preparing for the show. Preparation is the most important part of your exhibition and no matter how much you do you can never be over prepared. Here are some pointers on how you can prepare for your first ever art exhibition.
Choosing between a Group or a Solo Exhibition
The first thing to decide is whether you’ll go solo or you would prefer to do a group show. First check the quantity of paintings that you have that can be shown in a gallery. Be very strict and dispassionate in choosing the best pieces for the show. In case you do not have enough gallery worthy works the choice is clear. But even if you have enough works you may like to consider whether you’ll be able to organize the exhibition yourself with your own support system of family and friends. And moreover unless you are a known artist it is difficult to pull people to a solo show. A group show works well because people come in expecting variety of art work in the exhibition. However keep the group small. Go with maximum 2-4 members. When the number of members is too high coordination becomes a huge problem.
How to apply for a show and book the gallery
Government owned Galleries like Lalit Kala Akademi is a good place to organize Painting Exhibition
The gallery booking process is almost similar across galleries in India. Every gallery generally has a form to be filled. And along with the form you’ll have to attach the bio data, photo of the artist and a few photos of the works of the artist (for each artist). Make sure that the photographs you submit are of good quality. Because it is on the basis of the photograph that you’ll be judged. The photograph has to be as close to the painting as possible visually. Spend time in taking good quality photographs and invest in taking good prints of the images. It can be quite frustrating if your application is rejected because of poor quality of photographs.
When your application is approved you need to choose a date for your exhibition. Galleries are almost always booked for at least 6-12 months in advance. A few famous galleries are booked even 3-4 years in advance. Hence just choose the first available date that you and other participating artists can commit to. However if a date is available in very near future (say in 15-20 days time), don’t be tempted to take those dates. Keep at least 2 months time in your hand before the exhibition date. You’ll need it. You’ll need to pay an advance when you book the gallery. Sometimes you may have to pay in full and also pay a refundable caution amount. Do the necessary payments and keep the receipts safely.
Choose a Theme and Title for the Art Exhibition
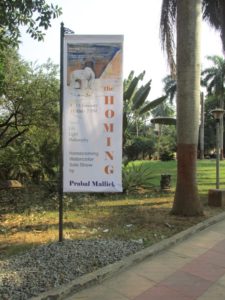
Title of the show and the Invitation Card were few of the reasons why many people flocked to my last solo exhibition
It may sound like a trivial task. But choosing a title for your art exhibition is actually one of the most time consuming and important tasks. When people get an invitation to your exhibition first thing that they notice is the title of the show. And they build up certain expectations according to the title and other information in the invitation. Hence your title or theme of the show needs to be in sync with what you are going to display. And it should also create enough interest to pull people to your art exhibition.
Sometimes you and other artists of your art show may have works that are very different from each other and it could confuse the viewer. In such a case you have two options. Find a few paintings of one uniting theme from your works and work on more paintings during the time you have till exhibition to fill in the gap. The other hacky option is to go for such a title that would justify the randomness of the repertoire. One such title could be ‘Kaleidoscope’. In such a case the viewer is actually expecting different themes, styles and subjects etc and hence will not be disappointed.
Getting a Curator helps
A curator for an art exhibition is someone who will act like a bridge between your art and the public. A lot of artists find it difficult to talk about their art. But art exhibition is basically an exercise of taking your work out of your studio and presenting it to the world outside your studio. So talking about your art and talking well is a skill every artist must pick up. But in case you find it difficult get a good curator to do the job for you. The curator will spend time with you to understand about your and your art. Try to help her out as much as possible in this process.
Layout and Design of the exhibition
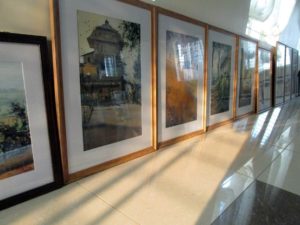
Where and how you display your paintings in the gallery must be decided early on. Check the display options available with the gallery. Check the focal point of the gallery. Focal point of a gallery is that place which draws the eye towards itself as soon as some one enters the gallery. Focal point of the gallery is a good place for your center piece(s). You can then plan the position of other paintings in relation to the center piece.
Another way to plan the display is to follow the natural path taken by the audience to view the paintings. You can sequence and arrange your works in such a way so that the viewer easily flows from one work to the other.
Framing
Plan to get your paintings framed well in time
Framing is something if done well can elevate the painting to a higher plane. And if not done well can pull the painting down. Especially for watercolor paintings, pastels, charcoal and graphite works framing is yet another important exercise that needs to be done well for an art exhibition. I like frames that are light in color, which do not compete with the painting. I also like to keep them as thin as possible. Off white matting is something I use as a thumb rule.
Get Someone to Open the Show
When someone opens your art exhibition people view it as the person endorsing your art. So if you get someone important to open your show people will take notice. Get in touch with a few well known artists of your area. Meet them personally, show a few of your works and request them to open your art show. If any of them likes your art there is a very high probability that he or she will accept your request. You can also consider museum directors, musicians, top officials of art institutes in your area to inaugurate your exhibition. Get at least three or four important and well known persons in your area to open your show. Sometimes the guests may not be able to make it to the opening of the show. If you had only one person opening the show and he/she does not turn up, then it becomes a very tricky situation. Hence it is good to keep at least two persons booked for the opening day for inauguration of your art exhibition.
Inviting Guests
Now that you have a title for the show and got a few known people to open your show its time to design and print your invitation cards. Just like the title, the invitation card, poster and banners etc also play a huge role in attracting people for your art exhibition. So take time to design them. Again you have to make sure that all of them have a similar feeling as the title and content of your art exhibition. Choose your colors, fonts, images carefully to achieve that. Additionally all these materials should have the same look and feel. You may use a common image, same fonts and color scheme to maintain the look and feel among all printed materials.
Next big question is whom should you invite. Every gallery maintains a invitee list. On request they would give it to you. Sometimes they do not share the list and in such a case you need to give invitation cards and soft copies of the invitation card to the gallery. The gallery administration will do the needful. Sometimes the galleries themselves offer to do the invitation card at a little extra cost. I would not advise going for this option, because they do very generic invitation card which really does not speak much about you or your works.
Generally the invitee list of the gallery is exhaustive. But at the same time it does not hurt to send invitation from your side to artists, art collectors, art institutions, educational institutions and all such persons/institutions who you wish to show your art to. Send the invitations about 4-8 days before your art exhibition, so that there is enough time for people to plan, but at the same time they do not get the invitation too early to forget.
Promotion of the exhibition
No matter how good your art is, no matter how well known the gallery is and no matter who is opening the show, you art exhibition does not have great chance of being successful unless you promote it well. Below are a few pointers on how you can promote your show. But there is no end to how well you can do promotion for your art exhibition. You are only limited by your imagination.
Posters
All promotion materials for your art exhibition should have same look and feel
Public places like restaurants, coffee shops, libraries, clubs, art stores, educational institutions, art institutions are great places to promote your art exhibition. Get posters printed in different sizes (A5, A4 and A3 sizes work well). Invite the authorities of such places for your show in person and ask them if you can put up a poster. Most likely after you have invited them they will agree to put up the poster. Always carry different types of tapes and pins with you; so that as soon as you have your permission of putting up your poster you can do the needful immediately.
Fliers
The easiest way to distribute fliers are through newspaper distribution network. Find out the newspaper distribution hubs in your area. This is the place where news papers are given to the delivery persons early in the morning. All the delivery persons from different areas then disperse to their respective areas for newspaper distribution. All you have to do is reach this hub well in time in the morning and get hold of an agent. Hand him the fliers and specify the targeted areas where you want the fliers to be distributed. He will then get those fliers inserted into newspapers going to those areas at a very minimal cost. This is one of the best ways to reach out to the general public.
Press and Media
Every major city has a press club from where you can send invitations for your art exhibition to all print and electronic media houses. All you have to do is give the required number of invitation card at the office of the press club and pay the necessary fees. Your invitations would reach every media house by the next day. Additionally identify a few news papers and radio channels where you can go personally and invite them for your show. You can also talk to them if they will be able to do an interview or feature on you before the show as a build up to the show. Get phone numbers of the journalists covering art events and don’t forget to call them up and remind them about your exhibition a day before your opening.
Be ready with a media kit all the time. Media kit consists of a write up about the show and your works, few photographs of your works, invitation card, your resume and your photograph. Store it in your mail and also create a few CD’s and keep them with you all the time. Ask the media persons you meet if they would like to have the media kit. It makes the job of the journalist’s much easier and who would not like that.
Activities
Plan a painting demonstration during your art exhibition draw crowd
Plan for a painting demonstration or two during and/or before your exhibition. This helps to bring in a lot of crowd. People always enjoy watching an artist paint. You can also invite a known artist to deliver a talk on some topic related to your type and style of art. This also generates a lot of interest. And last but not the least you can do some activity at a local restaurant or some other public place to create some buzz. For example hold a lucky draw contest at a restaurant or a mall and give away few prints of your works as prize. This will help you a great deal in promoting your art exhibition.
Online Promotion of your Art Exhibition
Online promotion is very effective to reach out to a large number of people. Create an event in facebook and share it with your contacts and request them to share is with their contacts. Thus you’ll be able to reach out to people at an exponential rate. Use twitter, instagram also to promote your event. There are many event listing sites. Register your event in such sites. A few sites that list events for free are eventbrite.com, eventful.com, myeventguru.com, evvnt.com, indiaeve.com. Another very good way to promote your art exhibition is to make a peppy short video on it and post it on youtube and share it with your contacts. The same video can be converted to lower resolution and circulated on WhatsApp. You can also take this video to local coffee shops and ask them to play it a few times in a day. They may ask for a small fee. But it may be worth investing in advertising in coffee shops. You can go for paid advertisement in facebook too .This will be more targeted and hence more effective.
Preparation for an art exhibition may seem like a huge unknown mountain to climb. But since you know what to do now you can plan and do all these tasks systematically. Make these activities as milestone activities and put an end date for each of them to be completed. Celebrate completion of each milestone and enjoy the build up to your art exhibition. In the next post on this series I’ll guide you on how to go about the exhibition when its running including preparation and conducting the opening day function.
With a little search you can find people and galleries who can organize the exhibition for you and all you have to do is just pay them. But what you need to pay is generally a huge amount. And moreover when you organize a few exhibitions on your own your contact list grows and that helps a lot in future. Hence I would recommend people planning for their first exhibition to organize it themselves. But doing a solo show in the first go can be a false step forward. It is better to have a group show and share responsibilities of organizing the exhibition.
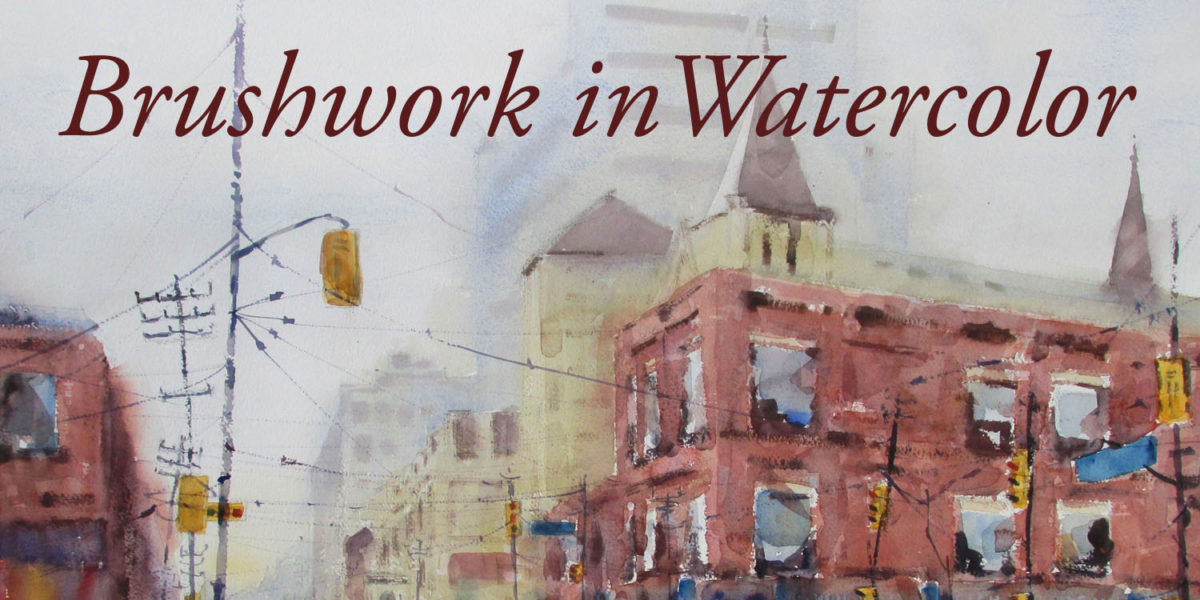
So what is Brushwork after all and why it should be such a big deal while painting in watercolor?
Brushwork can be defined as the process of applying paint on canvas/paper using a brush.What contributes the final outcome of brushwork in a painting (in context of watercolor technique) are amount and consistency of paint in the brush, the shape and size of the brush, wetness and surface texture of the paper, angle of the brush to the paper while applying paint, motion or movement of the brush, pressure of the brush on the paper, speed of the brush on paper, how the brush is held etc. In watercolor painting brushwork may seem not to be that important. That is because most of the painting in watercolor can be done by wash and wet in wet techniques. And many times we just let watercolor do its own things on paper where brush is not involved. So we can do away with brushwork in a watercolor painting and still produce great looking works.But is it really so?
Even in wash and wet in wet watercolour techniques size and shape of the brush, angle and pressure of the brush, motion and speed of the brush play an important role. If you really think of it anything that you do with a brush on paper is actually brushwork. Brushwork is the major technique that contributes to the ‘style’ of a watercolor artist. Moreover unlike other surfaces watercolor paper is responsive to how the brush touches it. You go a little hard and the surface can get damaged. But at times a painting demands aggressive brushwork. Hence brushwork is as important (if not more) to watercolor painting as it is to any other medium.
Examples of Brushwork Watercolor Technique
Below are some examples of brush work in my paintings. These are only a few examples. The possibilities of brushwork are actually limitless and you have to experiment with different ways to really understand the range of brushwork that you can produce.
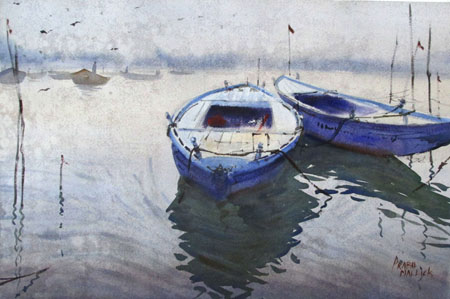
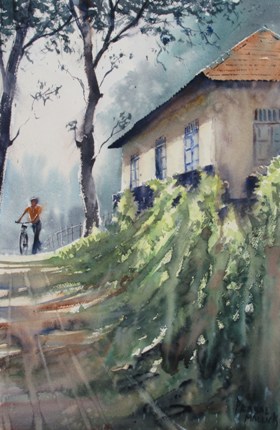
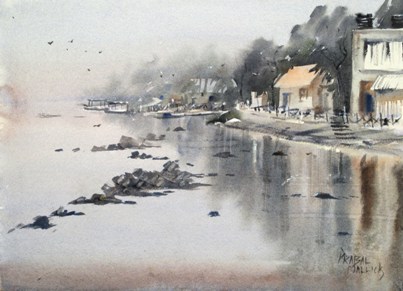
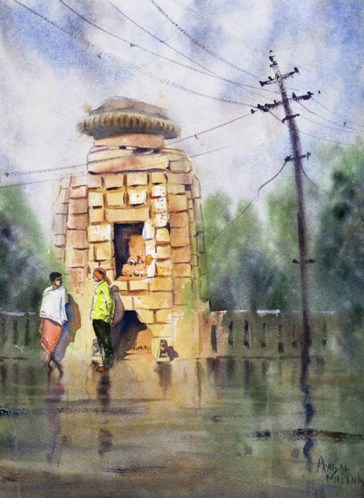
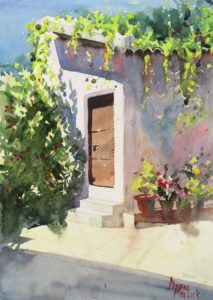
The white flowers in this painting are nothing but natural marks of a round brush in different tones, sizes and direction.The line shadows of different objects is actually what gives this painting movement and energy. These have been done with confident and fast strokes using a loaded rigger brush.The textures edge of the distant hills in this painting has been achieved by putting a semi loaded flat brush almost flat to the paper pointing away and then moving the brush forward and backward rhythmically.The reflection of the boats is done with a synthetic round brush using rhythmic overlapping horizontal strokes. Synthetic brush is used to get the fine pointed ends of the reflection shape.The almost dry leaves of the tree are done using the side of a round brush.The hair of the portrait is done with overlapping fast strokes of a flat brush.Fast and confident dry brush strokes using rigger and round brushes give life to this painting.The brown buildings in this painting are loaded with various types brush works. And this creates movement and interest.
Practicing Brushwork
Brushwork is all about practice. The idea is to get used to a brush and build muscle memory of using it in different ways. Hence a lot of deliberate practice is needed along with the practice you get from doing a painting. There are many type of brush control practice available on internet. You can pick up few of them and practice. The brush exercises by John Lovett is simple to understand and great for practicing.
The last thing I would like to touch upon is what is known as ‘Economy of brush strokes’. There is an optimum amount of brushwork that works for a painting. Anything beyond that makes the painting too heavy. It is always good to stay below the optimum amount of brushwork than to overdo it. Hence keeping amount of brush strokes to minimum in every stage of the painting is very crucial in retaining the freshness of the painting. And this fact can never be stressed enough.
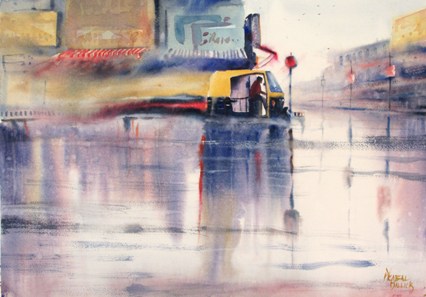
In my last post on Watercolor Technique I wrote about the Watercolor Wash technique. While wash technique gives luminosity or transparency to watercolor paintings, wet paper techniques like wet in wet create mystery and softness. If Wash technique is the heart of watercolor painting then Wet in wet technique could be called soul (or vice versa). In this technique watercolor paper plays a major role in the final outcome. Paper with more surface texture (rough and cold pressed) and more cotton content (100% cotton paper works best) is suitable for this technique. But you can try this technique on hot pressed and other smooth papers also and check the results you get.
Wet in Wet Watercolor Technique
Background foliage done in wet in wet gives a soft and mysterious feeling to the painting.
If you zoom into watercolor paper you’ll see something like a relief map with hills and plains of the watercolor paper texture. When you wet the paper the plains get flooded. It looks like a big lake with hills popping out here and there. Now if you drop some paint onto the paper, what will happen is anybody’s guess. The paint will spread in the lake in all directions. And that is exactly what wet in wet technique is all about. It is a way of spreading colors on paper automatically using water.
Here is how you can try out wet in wet technique.
Wet your watercolor paper well using a spray or flat brush. If you are using a brush, make sure it is a soft one and touch the paper very lightly while wetting the paper.
Take some paint in your brush and lightly ‘drop’ it on the paper. Do not press your brush hard. It will damage the surface of the paper.
Now watch the paint spread on its own and enjoy the show.
Yes. Wet in wet technique is this easy. But the devil as always lies in the detail. Hence lets take a closer look at this. When you try this technique a few times you’ll notice that the spreading of paint is not consistent. Sometimes the paint spreads to a larger area and other times it does not spread as much. Well when the paper used is the same, the spreading of paint depends on two things.
How heavy or light is the flooding of your landmass! In watercolor terms how wet is your paper.
How thick or thin is the paint you are dropping.
How wet is your paper?
Reflections and the foliage is done using wet in wet with milk and cream on moist.
So lets first talk about different stages of wetness of the paper. The terms I am going to use are taken from this book by Joseph Zbukvic. These terms are very intuitive and are used by many watercolor artists around the world. Hence I have used them here. Why reinvent the wheel!
If you wet your paper thoroughly and then let it dry then the different stages of wetness is roughly categorized into 4 parts.
Wet – When landmass of the paper surface including most of the hills are flooded. At this stage your paper would be glistening. In this stage paint will flow very quickly and without any control in all directions.
Moist – In this stage the flood is not so severe. But still its a flood. Paper would be wet to touch, but not glistening so much. In this stage paint flows well, but its a controlled flow and does not spread to great distance.
Damp – This is like a normal situation where the rivers are flowing well, but without flooding. When you place your palm on the paper, you’ll feel the moisture content of the paper. It is a stage just before the paper dries out. In this stage paint does not flow much and it also does not flow on all parts of the paper. This stage is used to create a mixture of soft and hard edges.
Dry – In this stage the landmass of paper is barren dry. No sign of moisture whatsoever. This is your plain dry paper and hence paint will not spread at all.
How thick is your paint?
Foliage and Foreground was done using cream and butter on moist. It helps to pop out the center of interest in the painting.
This watercolor technique also depends on how much water you add to your pigments. Here are a few terms again from the book Mastering Mood and Atmosphere to explain the paint consistency in an intuitive manner.
Tea – Pigment to Water ratio is around 1:9. This will spread fast and without control.
Coffee – Pigment to Water ratio is around 3:7. This will also spread well with soft edges; but not so well on damp paper.
Milk – Pigment to Water ratio is around 1:1 This will spread well only on wet and moist paper.
Cream – Pigment to Water ratio is around 7:3 This spreads well only on wet and moist paper. But of course it will spread less than milk.
Butter – There is no water in this mix. Just pure paint straight out of the tube. This will tend to stick to the paper at the place it is applied and only a part of the pigments will loosen up and spread on wet paper and to some extent on moist paper.
Here is a demonstration video using different combinations paper wetness and paint consistency in watercolor wet in wet technique.
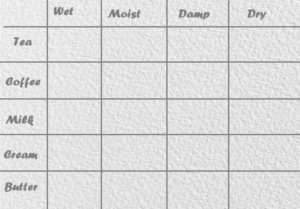
Wet in Wet Watercolor Technique Reference Table
Wet in wet reference table
Now that you know about the different stages of wetness of paper and paint consistencies, its time for you do an exercise. By doing this exercise you’ll understand the behavior of paint for this watercolor technique and different types of edges that are produced. And then when you have the understanding of the edges, you can apply it to your work consciously.
Create a table as shown on watercolor paper. The individual boxes should be 2 x 2 inch at least.
Now wet the first row of the matrix using a flat brush.
Take a tea mix and drop in the first box.
Wait for sometimes for the paper to come to moist stage and then drop tea mix in the second box.
Wait again for sometime for the 3rd box to come to damp stage and drop tea mix into it.
In the last box drop the paint when paper is dry.
When the first row has dried out wet the second row and repeat step 3 to 6 using a coffee mix.
For 3rd, 4th and 5th row use milk, cream and butter to complete the exercise.
Now what you have is a wet in wet reference table. Use this table next time to get the edge that you want in your painting.
Lot of unusual effects can be obtained with wet in wet technique.
By now it must be clear to you that wet in wet watercolor technique is all about timing. You have to get a feel of how wet the paper is and how much water you have put into your paint. This ‘feel’ comes with practice. The reference table that you must make will not come out well in your first few attempts. As you practice more and get the ‘feel’ your reference table will keep improving and will be perfect at some point in time. And that is a milestone you must aim for to achieve. And when you have got a good hang of wet in wet watercolor technique, the range effects that you can get with this is limitless.
A few days back a young and enthusiastic painter asked me about the watercolor technique I have used for a particular piece he seemed to like. Unfortunately I disappointed him by not answering the question because I myself did not have a clear answer to the question. When I paint I am really not thinking in terms of watercolor techniques. I am thinking in terms of the result that I want to achieve (sometimes my thinking is too abstract to be understood even by me). For example I think “I need a soft edge here”. I do not think “I need to do wet in wet here”. Though wet in wet is one of the watercolor techniques I would employ to get the soft edge I do not necessarily think in terms of the name of the technique. I just use it.
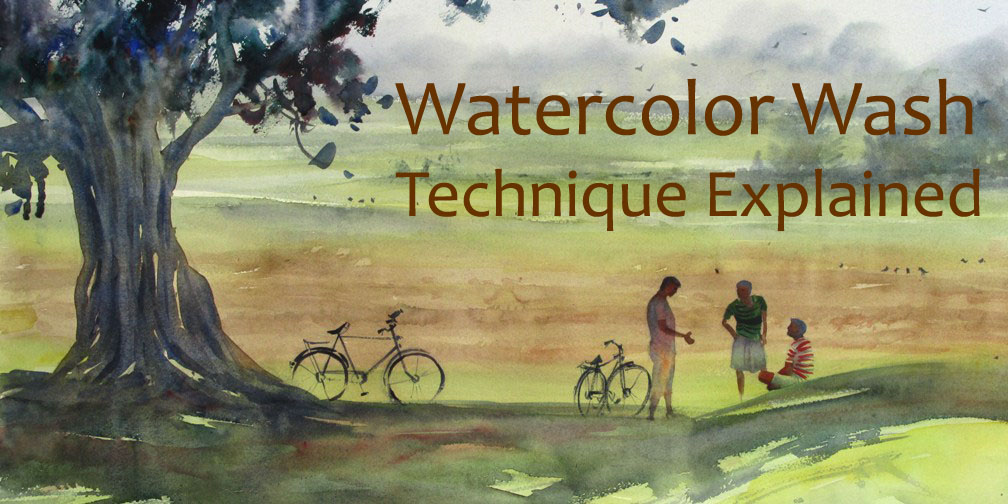
But at the same time talking in terms of techniques help in specific non-abstract verbal and written communication. Especially for beginners who are focused on learning handling of paint and brushes, it is very necessary to speak in terms of techniques. In this series of posts I’ll touch upon Watercolor Techniques I have learnt and used in my works so far. These techniques are going to be from basic to the specialized ones and I am sure it will help everyone learning watercolors. In the first post of this series I’ll discuss the Watercolor Wash Technique.
Wash, The fundamental Watercolor Technique
In watercolor it is best when you let gravity do most of the painting for you. When you let the paint flow down the paper using gravitation force of the earth, the color pigments settle in the troughs of the paper surface in a natural way and that creates a luminous look. This is known as ‘washing’ the paper. Quite an intuitive name for a painting technique I would say!
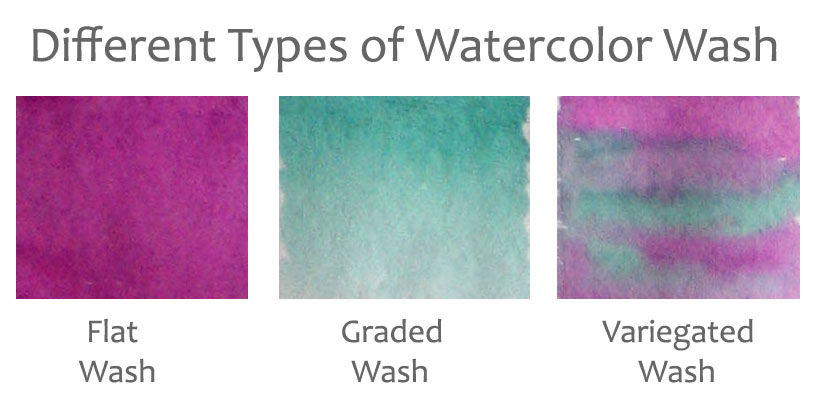
Watercolor Technique – Different types of watercolor washes
This is how you go about the wash technique.
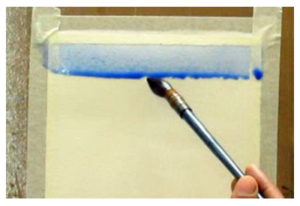
Keep your board at an angle to the the ground, so that water can flow downwards slowly.
Mix pigments with water and load a plump brush that can hold a large amount of water. Mix enough paint so that you don’t run out of it in between.
Now touching the paper softly with the loaded brush make stroke at the top part of the paper from one end to the other.
Observe how the paint flows down the paper and forms a ‘bead’ at the bottom of the stroke. Now put a second stroke just below the first stroke touching topmost part of the brush to the bead, so that both the strokes combine become one.
Do not touch the first stroke. Just use the bead to put the second stroke so that both the strokes combine.
Again let the bead form at the bottom of the new stroke. If the bead is not forming you are not using enough paint. Supplement the stroke with some more paint so that the bead can form . Now using the bead put the next stroke so that it combines with the stroke above.
Continue till the end of paper avoiding going over painted areas again.
Voila! your first proper watercolor flat wash is now done.
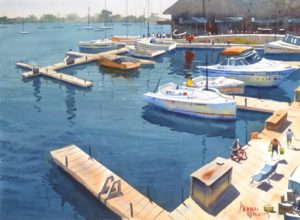
The lake is done with a flat wash of blue. Later strokes were added for the ripples.
Here are answers to some FAQ on this watercolor technique.
What is the angle of the board to the ground? – The angle of the paper to the ground can be as low as 10° as high as 90°. Higher the angle faster the water will flow down the paper and hence you have to work faster to control the flow. For beginners I would suggest keeping the board at approximately 20°-30° to the ground. As you get more and more comfortable with handling watercolor you can vary the angle according to your convenience.
What is the paint to water ratio for wash technique? – The paint and water mixture should not be thick. It should be of a watery consistency like tea or milk and everything in between. Else the paint will not flow down the paper. For starters make a mix of 20% paint with 80% water. Increase and decrease the amount of water and then observe how the wash comes out.
How long should I wait for the bead to form? – Don’t wait for ever to let the bead form. If you wait too long then a hard line will form at the bottom of your stroke, because the paint will start to dry. If your paper is not of artist quality then the hard line forms much faster.
What brush should I use? – You can use a round brush or a flat brush for the wash. Make sure it can hold a lot of water. A mop brush works really well for wash as it holds the maximum amount of water.
What is the size of the brush I should use? – Size of the brush really depends on the size of the area you are going to wash. A brush should hold enough water to make at least a couple of undisturbed stroke from one side of the paper to the other.
Graded Wash
Bead of paint forming at the bottom of a stroke
The outcome of a graded wash is similar to flat wash except that the color intensity slowly increases of decreases from top to bottom of the paper; The kind of wash that you’ll see in the painting of a sky or vast green fields. To make a graded wash follow the same method as a flat wash. But instead of using the same mixture of paint every time, use a more diluted paint mixture for every new stroke. Keep adding water to the paint mixture as you go down the paper putting strokes.
Some Tips on Graded Wash Watercolor Technique
When you are creating the wash the paint is still wet and the gradation of the color will be difficult to see from one stroke to the other. Many beginners tend to put more water to the subsequent strokes than what is necessary because of this. And this creates a hard transition of tone. So do not worry too much while creating the wash. Just keep adding consistent amount of water from one stroke to the next and you’ll have your beautiful graded wash in the end.
Preferably do not use the brush with which you are painting to get more water into the mix. Use another brush or a water dropper to get more water into the mix.
Generally it is easier to go dark to light in this watercolor technique. In other words it is easier to make the paint consistency thinner as we go on creating the wash. You can also do the opposite. That is keep adding more pigments to the mix as you go on putting strokes. But the watery paint from the top stroke tends to push out pigments of the new stroke, which is thicker. So this needs some mastery to be done well and also needs to be done at a lower slope of the board. One hack to go light to dark is to paint dark to light by rotating the paper by 180°.
Variegated Wash
This type of wash is used to gently merge colors into each other to create a slow color transition effect. You’ll need minimum 2 colors for this watercolor technique.
Lay down a wash of one color quickly on paper. The whole paper need not be filled with it.
Before it dries introduce wash of second color into it gently. The second color should not be applied evenly. You can leave some areas of the first color as it is and you can paint over unpainted areas with the second color. In rest of the places the two colors will merge into each other creating a third color.
Continue the wash down the paper by using both the colors.
All the time while you paint make sure that you are letting the paint flow on the paper due to gravity. Let it dry and see how magically the colors have blended into each other.
The shadow on the wall has been done with a variegated wash of pink and blue.
A wash technique in the end remains a watercolor technique whereby you use gravity to pull the paint down and let the pigments settle on the paper naturally. And this is what gives watercolor painting its luminosity. If the paint is not allowed to flow naturally, it becomes muddy and looks really bad. So irrespective of the size and shape of the area that you paint in watercolor, if you want a transparent look you have to use wash technique. Be conscious of this fact while painting and get into the habit of using this watercolor technique. Soon you’ll notice the difference in your work.
Watercolour is an ‘alive’ medium. It behaves in myriads of different ways according to how it is used. One of the biggest variations in behavior of watercolor is actually not due to watercolor itself, but the surface on which it is applied. That is the watercolor paper. Watercolour paper is one of the most important parts of the watercolor jigsaw puzzle. If you are painting in watercolors you ought to know about different types of paper, so that you can choose the best paper that is suited for your style or for a particular piece. This post on Watercolor Paper is a complete guide on different types of watercolor paper and their properties. I’ll also touch upon alternatives and supplements to Watercolour Paper that you can use for becoming more effective at watercolor painting while saving money. In case you are a beginner in watercolor, before you dig any further I would recommend you to go through my post on Watercolor Painting for Beginners.
What is Watercolor Paper made up of ?
Painting on Hot Pressed Paper – Colors retain their vibrancy. Dry brushing does not work well.
Watercolour Paper is a special type of paper made with cellulose, which is the material that plants use to build their stems and leaves. The cellulose can be derive from many sources, but typically watercolor papers are made from the cellulose derived from cotton and wood pulp. Cotton is much stronger than wood pulp and is also pH neutral, meaning it is naturally acid free. Wood pulp is not as strong as cotton and is also acidic. Wood pulp has to be chemically treated during manufacturing process to make the paper acid free. In case you are wondering what does acid free mean, it is nothing but being neutral on pH scale. Residual acid make paper go yellow with age. Hence ideally you would want your watercolor paper to be acid free in case you want it not to yellow with age. Watercolor paper with more cotton content therefore is better from strength and acid free property point of view. Some papers are marked as 100% cotton. That means it will be a good Watercolour Paper and by the way more expensive too.
There are two types of watercolor paper available in the market based on quality. Artist grade and student grade. You would find that artist quality is made up of 100% cotton while student quality is not. And student quality may or may not be acid free, which makes student quality Watercolour Paper cheaper than artist quality Watercolor Paper.
How is Watercolour Paper Made ?
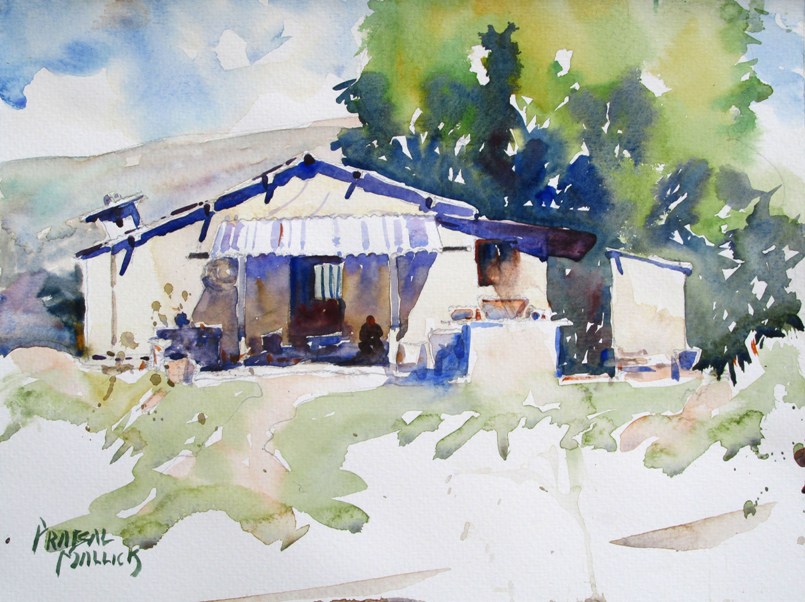
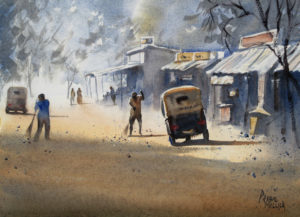
Painting on 400 GSM Rough Paper – Dry brushing has been used as the major technique here.
Individual cellulose fibers are separated by soaking and pounding of the pulp. Then it is mixed with water and this liquid is used to make the paper. When made by hand this is spread on a mould by hand and dried. This leads to variations in texture due to randomness in direction of the fibre. The machine made paper has uniform texture as all the fibres get aligned in the same direction. If the paper is made with a cylindrical mould then its texture variation would be more than machine made paper, but less than handmade paper. Generally as a rule hand made paper would have deckled edges on all four sides, mould made paper would have it on two sides and machine made paper would have none.
Most of the time the machine made paper is sold as student quality paper, while the mould made and hand made varieties are sold as artist grade paper.
Weight and Size of Watercolor Paper
Though there are quiet a few specifications on the size of watercolor paper, the most commonly used are as follows.
Name
Size in Inches
Full imperial
22 x 30
Half Imperial
15 x 22
Quarter imperial
11 x 15
Elephant(USA)
27.75 x 40
Double Elephant (USA)
29 x 41
Double Elephant (UK)
27 x 40
Emperor (USA)
40 x 60
Thicker watercolor papers can withstand rough use, buckling and bending due to effect of water. Hence watercolor paper is also specified according to its thickness using a term called Grams per Square Meter or GSM. It is defined as the weight of a 1 x 1 meter paper in grams. Sometimes you may come across another term called pound per ream or just lb. This is defined as the weight in pound of 500 sheets of full imperial size. Here are some of the commonly used watercolor paper according to their GSM specification.
Relative weight
GSM
Pounds per Ream
Usage
Heavy
550-600
260-280
Generally used for large works. Does not need stretching.
Medium
300-400
140-190
Generally used for small to medium size works. May need stretching.
Light
170-280
80-130
Generally used for small size works. It needs stretching.
Surface Finish of Watercolour Paper
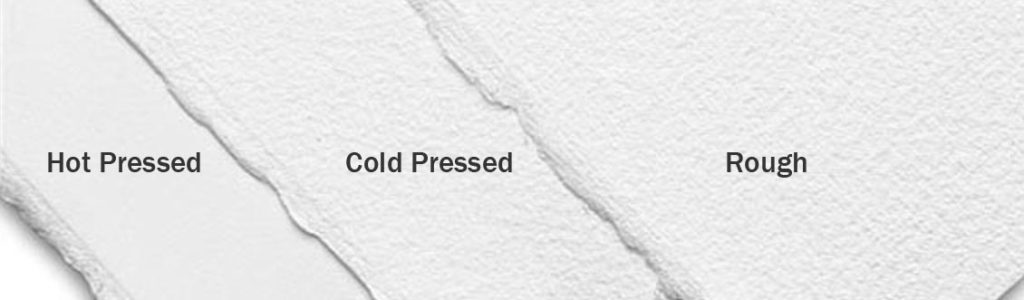
Watercolor Paper surface finish – Hot Pressed, Cold Pressed and Rough
This is the most interesting feature of watercolor paper and this is going to play the biggest role in the outcome of your watercolor works. When mould made watercolor paper is dried it is either pressed using a press or a roller is rolled on it. Depending on the texture of this press or roller the paper gets its texture. In handmade paper making however the paper is left to dry on its own and the texture is formed because of the natural variation of the cellulose as it dries. There are three kind of surfaces that you get in the stores. The paper with maximum surface roughness or texture is called ‘Rough’. This is generally rolled or pressed between a felt cloth from where the texture of the paper is derived. The paper with smooth surface finish is called ‘Hot Pressed’. Paper is pressed between smooth plates and sometimes this plate is hot. Hence the name Hot pressed. And the one having roughness somewhere in between these two is called ‘Cold Pressed’ (Its called ‘Not’ in UK). This is pressed using a mechanical press with finer grains or rolled with a roller covered with felt cloth of finer texture than what is used to dry Rough paper. Here is a comparison table showing the difference of these surfaces from paint application point of view.
Finish
Properties
Rough
Most absorbent.Surface traps watercolor pigments creating an even watercolor wash. Best for dry brush technique. Not great for lifting and corrections. Best suited for aggressive brush techniques. Not for highly detailed works as the surface texture does not allow small details to be painted in correct shape. Color vibrancy is not the best on rough paper. Works well with all painting consistencies, from very diluted to undiluted.
Cold Pressed
Medium absorbency. Washes come out almost as good as rough paper. Dry brush technique works to some extent. Some amount of lifting and corrections can be done. It can take most of the aggressive brush technique well. A good amount of detailed work can also be done on this. Vibrancy of colors is good as long as glazes are kept to a minimum. Works well with all painting consistencies, from very diluted to undiluted.
Hot Pressed
This is the least absorbent paper. Washes turn out uneven, but it gives a nice juicy look. Dry brush technique just wont work on this. Best suited for lifting and corrections. Brush work has to be light and delicate. Aggressive brush work really does not work on this paper. Best suited for highly detailed work. This is the best paper for retaining the vibrancy of colors. Does not work well with undiluted paint.
Sheet, Roll or Pad ?
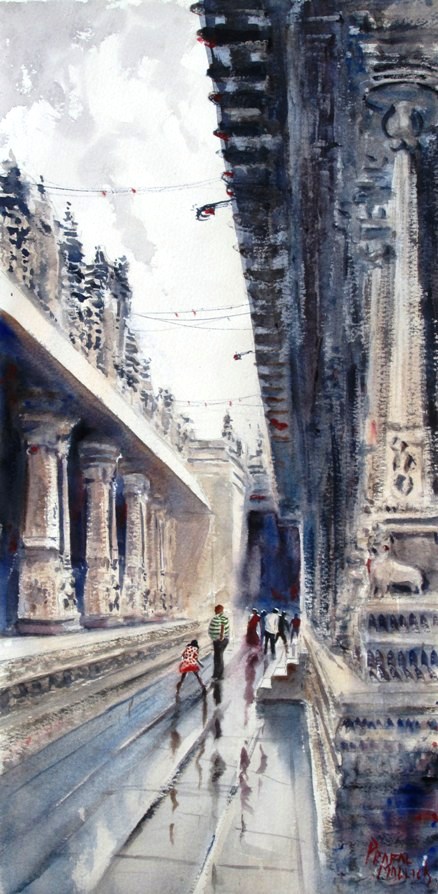
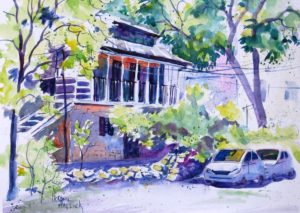
Painting done on Cold Pressed Paper – Paper response is somewhere in between Rough and Hot pressed.
Watercolour paper comes in three forms. Sheets, Rolls and Pads or Blocks. Now a days rolls come in approximately 44 inch x 10 yard size, while sheets generally come in full imperial size. You can also get sheets which are approximately of the same size as elephant and double elephant papers. Pads are pre-cut watercolor sheets in a notebook form either spiral bounded or glued on one side. Blocks are like pads except they are glued on all sides. Hence you automatically get a pre-stretched paper with a support of the block to paint on. If you take price per area of paper then pads and blocks turn out to be quite expensive in comparison with sheets and rolls.
I recommend using sheets and rolls in general because they can be cut to any size and and are cheaper. But its good to have pads of smaller size for quick outdoor painting and sketching. I generally use two pads. One is of size 10×14 inch while the other is 9×12 inch.You also get watercolor boards which is nothing but watercolour paper glued to a stiff board.In this form the paper is pre-stretched on the board.
Going Beyond Watercolor Paper
Painting Done on Chart Paper – Its a decent substitute for Hot Pressed paper.
All said and done watercolor paper does not come cheap. Whether you are a student or a professional you are going to end up using a lot of sheets in a year. Most of them would be for practice and rough works. And it really does not make sense to use expensive watercolor paper every time. So I am going to suggest a few alternatives which is going to cost you much less than the standard watercolour paper.
Indian Handmade WATERCOLOR Paper
In India this paper made locally at different parts of the country and sold as handmade paper for watercolor. It is also exported to other countries like USA, UK. So getting them should not be a difficult task. This paper is around 250-270 gsm in weight and comes in rough and matte textures. The price of these sheets can vary from Rs 20 to Rs 50 per sheet. It responds as well as the best rough and cold pressed papers of the world to watercolor. This is made of 100% rag and hence painting on these is a great joy. If you want to use it as a substitute to rough and cold pressed paper you can. The biggest drawback however of these papers is that it is not acid free. And it can also be a little inconsistent as it is made with hands.
Chart Paper
Surprised? Yes I am talking about the everyday cardboard paper or chart paper. Its weight is around 250 gsm and comes in a smooth finish. Its surface responds to watercolor in a very similar manner to hot pressed paper. The problem again with these is that they are not acid free in general. Acid free chart papers are also available. But they are slightly more expensive, but still cheaper than hot pressed watercolor paper.
Cartridge Paper
Cartridge paper is generally used for sketching purpose. But it can also be used for making a full blown watercolor painting. Care has to be taken to keep the glazes to a maximum of 2-3. Many artists are not comfortable with cartridge paper due to its wight as its comes in 120-150 gsm. But still this paper is excellent for quick outdoor sketches in small formats.
How to Choose Watercolour Paper
Sketch done on Indian Handmade Paper – The surface response is as good as the best rough paper. But it is not acid free.
Now that you have a great amount of information on the watercolor paper, when the time comes how do you choose the right watercolour paper? Let me summarize everything here.
If you are starting out then I would suggest to use Indian handmade paper, chart paper and cartridge paper to get a good understanding of different surfaces at a much lower cost. Gradually start buying watercolor paper when you area a little comfortable with handling watercolor.
If you are buying paper for doing your final works then
Check if your paper is 100% cotton.
Check for acid free tag.
Choose a paper that is at least 300 gsm.
Choose the surface according to your style and techniques that you generally use.
Preferably buy hand made or mould made papers. If you are buying machine made paper, make sure that is it artist quality.
Buy sheets and rolls for paintings. For quick outdoor paintings however its good to have small size pads.
Few Tips
Sketch done on Cartridge Paper – Cartridge Paper is best for quick sketches
Do bulk buying during discounts season to save some money. Bulk buying in a group also helps save a lot of money. But be sure to store them away from moisture.
Sometimes paper manufactures close their shop or sell their business to another company. In such cases either you stop getting your favorite paper or the quality of the paper changes. So it is best not to get used to one brand of paper. Try out all brands and all types of paper to see what suits your style. Zero down on at least 2 brands and at least 2 surface finishes. Get used to all of them.
Painting on different surfaces also helps you find new horizons in your work. So paint on different surfaces like chart paper and cartridge paper.Talk to your artist friends to find out what surfaces they paint on. Exchange your papers and try them out. Experiment with different papers, surfaces finish and find out the best paper suited for you but dont get stuck to just one of them.
My last words would be to forget the cost of the paper when you are painting. When you worry about it, you would want to create a masterpiece every time you paint and that would put undue pressure on yourself. Unfortunately it would show in the painting. So forget about it and just play with paint and have fun.
One of the most common questions that I get from people from different walks of life is this. “How do I start painting with watercolour or how do I approach watercolour painting?” And this is the exact question that I had in my mind before I started painting in watercolour. Earlier I used to paint only in opaque medium like oils and pastels. The transparent watercolour paintings remained an enigma for me until I did my first watercolour painting. And after my first attempt at the medium, watercolour puzzle became even more difficult to solve. Having painted in opaque medium all my life, painting in a transparent medium was like trying to walk on water. And the ‘lively’ nature of watercolour was not making things easy for me either. After my first few paintings in watercolour failed miserably, I had decided never to try watercolour in my life. But destiny had different plans. When I reflect on this now I am left to wonder about how many people on earth would be giving up on watercolour everyday. And the main reason I strongly feel behind this is the lack of proper guidance. Hence I thought it would be a good idea to write on “Watercolor painting for beginners”.
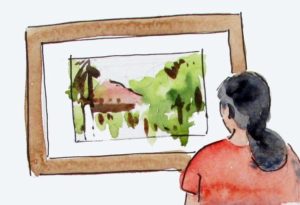
Inspiration before you begin with watercolour
Go to see an exhibition to get some inspiration for watercolor.
I am sure if you are keen on starting with watercolour you must have been inspired by watercolour works of different people. But still it is not a bad idea to get inspired further. The first place to start is right in front of you. Just search the internet for watercolour master artists and look at their works. Look at works of watercolour artists from different parts of the world. Try and understand their approach to watercolour painting. It will give an idea about the endless possibilities of watercolour. Look at different subjects. See what are you drawn to most. And then go to your local gallery or some art show where you can get to see watercolour directly in front of you. Seeing a picture on the computer just can not match looking at a watercolour that is directly in front of you. In case you get a chance to talk to the artist in the gallery there is nothing like it.
Now that you have been inspired and roaring to go and paint your first masterpiece in watercolour, this is the exact time when you have to forget about things you have seen. Inspiration is good. But it can also become a baggage as you’ll start to compare your paintings with what you have been inspired by. Unless you are a genius who just cannot do anything wrong, your first watercolour painting is not going to be comparable to the works of masters. Hence there is no use of having astronomical expectation from yourself which can lead to de-motivation. In fact what you have to ponder on is that the first watercolour work of the maters may not have been as good as your first work. How about a little bit of positive thinking.
Watercolour supplies
The next thing that you need to do is to go and buy supplies. Most beginners of watercolor always end up buying a lot of unnecessary supplies. My advice would be to keep things simple and compact to start with. This is my suggested list of supplies that is enough to start painting in watercolor for beginners.
Brushes – One each of 1 inch flat, No 12 Round, No 8 Round, No 4 round, No 6 Rigger brush is a great set to start with. Try and get natural hair brushes like sable or squirrel hair for the first three brushes mentioned as they would be able to hold more water and will be gentle on the paper. For the no 4 round get a synthetic hair brush. A stronger brush tip of the synthetic hair brush is good for details. I prefer a synthetic hair rigger just for the bounce it gives on paper.
Palette – 8 to 12 well palette with 2 mixing areas is good enough. If you can get a foldable one, its even better because you can easily travel with it.
Paper – Watercolour paper surface and quality are very important for a successful watercolour work. To start with you can get cold pressed paper, whose surface is somewhere between rough and hot pressed paper in texture. In case you can get hold of Indian handmade paper just buy it. Though it can be a bit inconsistent, the surface quality compared to the cost is unmatchable. A full imperial paper comes in the size of 22 x 30 inch. Divide each sheet into 8 parts. I would not recommend painting on any bigger size of paper when you start with watercolour painting. Gradually with experience you can increase the size of the paper. Alternatively you can buy a watercolour pad of similar size. But it will cost you more.
Paints – Though you’ll want to try out all the colours and its different shades in the world in the beginning (just like I did) I would strongly discourage that. Working with a lot of colour initially will confuse you and make your work also look very confusing. So stick to a few basic colours to start with. My recommended list of paints is 2 shades of each primary, 1 shade each of secondary, a brown and a black. The list is as follows.
French Ultramarine – Warmer blue
Cobalt Blue – Cooler blue
Vermilion – Warmer red
Crimson –Cooler red
Gamboge Yellow – Or any other brighter yellow
Yellow Ochre
Sap Green
Orange
Burnt sienna
Paynes Gray
Other tools – You’ll need a few other tools to paint in watercolours. These are a board and some paper clips, a cotton towel, pencil and a spray bottle. Some people ask me whether masking fluid is also needed. I strongly discourage the use of masking fluid for beginners. Use of masking fluid can cause bad habits to develop, which will be very difficult to correct later on.
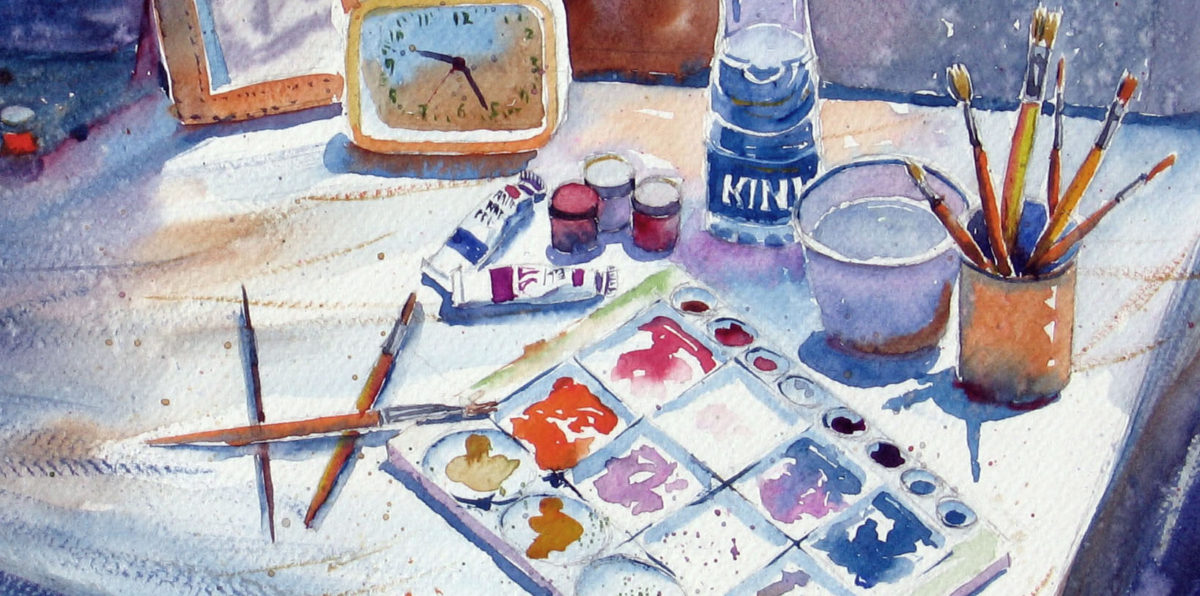
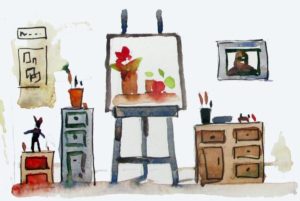
Studio setup
Watercolor studio does not have to be elaborate. You can even paint on your dining table.
Now that you have got your supplies you need a place to paint. If you can manage then try and get a quiet corner in your home or garage. Just put a table there are you are good to go. If you cant get a separate place for painting, then don’t worry, your study table or even your dining table is good. Watercolour is easy to clean up, pack and store. So just open your supplies on your dining table when you are not eating and store them away when you are done with your painting. However just make sure that the place is well lit up, so that you can easily see what you are painting.
Join a watercolour class
Bad habits are easy to develop and difficult to give up. Its true while painting in watercolours too. Hence find out a watercolour course in your area and join that. It is very difficult to find out your own mistakes, because while painting it is not easy to observe your own habits. An experienced teacher can easily find out the bad habits that you have or may develop. Additionally its good to get a hang of basic watercolour techniques like different kind of washes, wet in wet and dry brush techniques from an experienced teacher. In a short time you’ll be able to master these techniques if you learnt directly from a teacher, because again she will be able to guide you well on those. Books are good, but then they will not be able to tell you where you are going wrong in your approach to watercolor painting.
Another advantage of a class is that you’ll not be alone. There will be many others in the class and it is always fun to learn in a group. You’ll also be able to learn quite a bit from each other. So go ahead join a class and have fun.
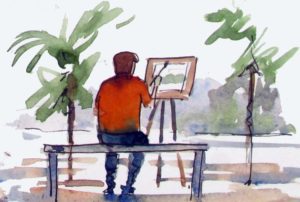
Get outside
Painting outdoors or en plein air is great for improving in watercolor.
Most artists would tell you that Mother Nature is the best teacher of art. Painting outside in the lap of nature is an invigorating and refreshing experience. You’ll not only develop a keen sense of observation and colour when you paint outside, the sheer joy of painting outside will also improve your work. It may be a little difficult initially to stop worrying about all the curious people looking at what you are doing and probably judging your work. But with frequent outdoor session you’ll get over these issues.
While painting in the open or en plein air you’ll have to work faster than your usual pace. You’ll also have to work with a limited set of equipment and colour. All these will bring spontaneity and freshness to your work. If ever I have to choose just one point approach to watercolour painting for beginners, then that would be to go outside and learn from life.
Keep your approach to watercolour painting simple
One mistake everyone does when they start painting is to paint every detail they see. Watercolour is a simple medium. And it works best when things are kept simple. Work in big shapes. Avoid all the tiny winey shapes in your painting. Paint outside the line. And most importantly don’t try to control watercolours. Let it do what it wants to do. Be a bystander and watch watercolour do its magic on paper. Approach watercolour like a partner and not a servant. Don’t try to do all the work yourself. Watercolour will paint itself if you let it.
Practice and Have Fun with watercolour
Just like any other art discipline watercolour also needs dedicated hours of practice everyday. So just make sure you have some time reserved everyday for yourself to practice. Even 30 minutes of practice on a daily will do wonders. You could reserve 30 minutes out of your lunch break or reserve the first 30 minutes of the day for it. Suit yourself. Because watercolour is so portable, you can carry it anywhere and practice anywhere.
But at the same time don’t get too serious about producing masterpieces every time you paint. Stop having fixed ideas about the outcome. Practice is supposed just what it is; practice. So just have fun with watercolor instead of getting bogged down by it. Paint anything and everything. Just paint whatever is in front of you. It does not have to be a pretty flower or a landscape. It could be an ugly insect too. But your approach to watercolour will make it beautiful. So just paint and have fun.
Artist’s Block
There will be many times when you’ll feel that you are not going anywhere. You are stuck at the same place and not able to improve from there. Don’t worry. It’s a very well known psychological condition called the artist’s block. You are bound to suffer from it time and again during your watercolour journey. The good news is that the cure is very simple. Just take out your older works which you had done probably a year back and compare them with your latest works. There would be great difference if you have been painting regularly. That will tell you that the improvement comes gradually and not overnight. So have patience.
And then just forget watercolor for sometime. You can also simply go out, watch a movie or meet up with friends or just cook dinner for the family. Do anything to take your mind off watercolour. When you come back to it you’ll find that your painting actually looks better. The reason is that artists tend to be very self critical and judgmental about themselves. While it helps to become better at what they do, it also can become de-motivating. Sometimes it is required for you to just stop judging your own work and appreciate it for what it is.
If someone had given me some idea about how to approach watercolour painting in the beginning it surely would have been very helpful. Though eventually I learnt everything on my own it did take longer to discover these things which were already known by seasoned artists. And thankfully I did not give up in the beginning as many other do because of these road blocks. I hope this post on approach to watercolour painting for beginners explained, will help everyone who is planning to pick up watercolours. Let the watercolour tribe increase.